Creating Particle Systems in UDK
By Nick Urko, C15 Level Designer
UDK Version December 2010 Beta
Created on 1/26/2011
This article will walk you through the steps involved in exporting a custom particle from Photoshop into UDK, and implementing it in the Cascade editor.
|
|

Create a Particle in Photoshop
Rules to keep in mind:
-
The file size must be in a power of 2 (64, 128, 256, 512, 1024...) A file that is not in a power of two will not import into UDK.
-
You can color the particle in UDK, so leave it gray scale for now.
-
You may wish to make an alpha channel to handle the particle's opacity once it is in UDK.
-
Save your particle as a Targa (.TGA)
-
If you made an alpha channel, save your Targa as a 32 bit/pixel image. If you did not make an alpha channel, save it as a 24 bit/pixel image.

Importing the Particle into UDK
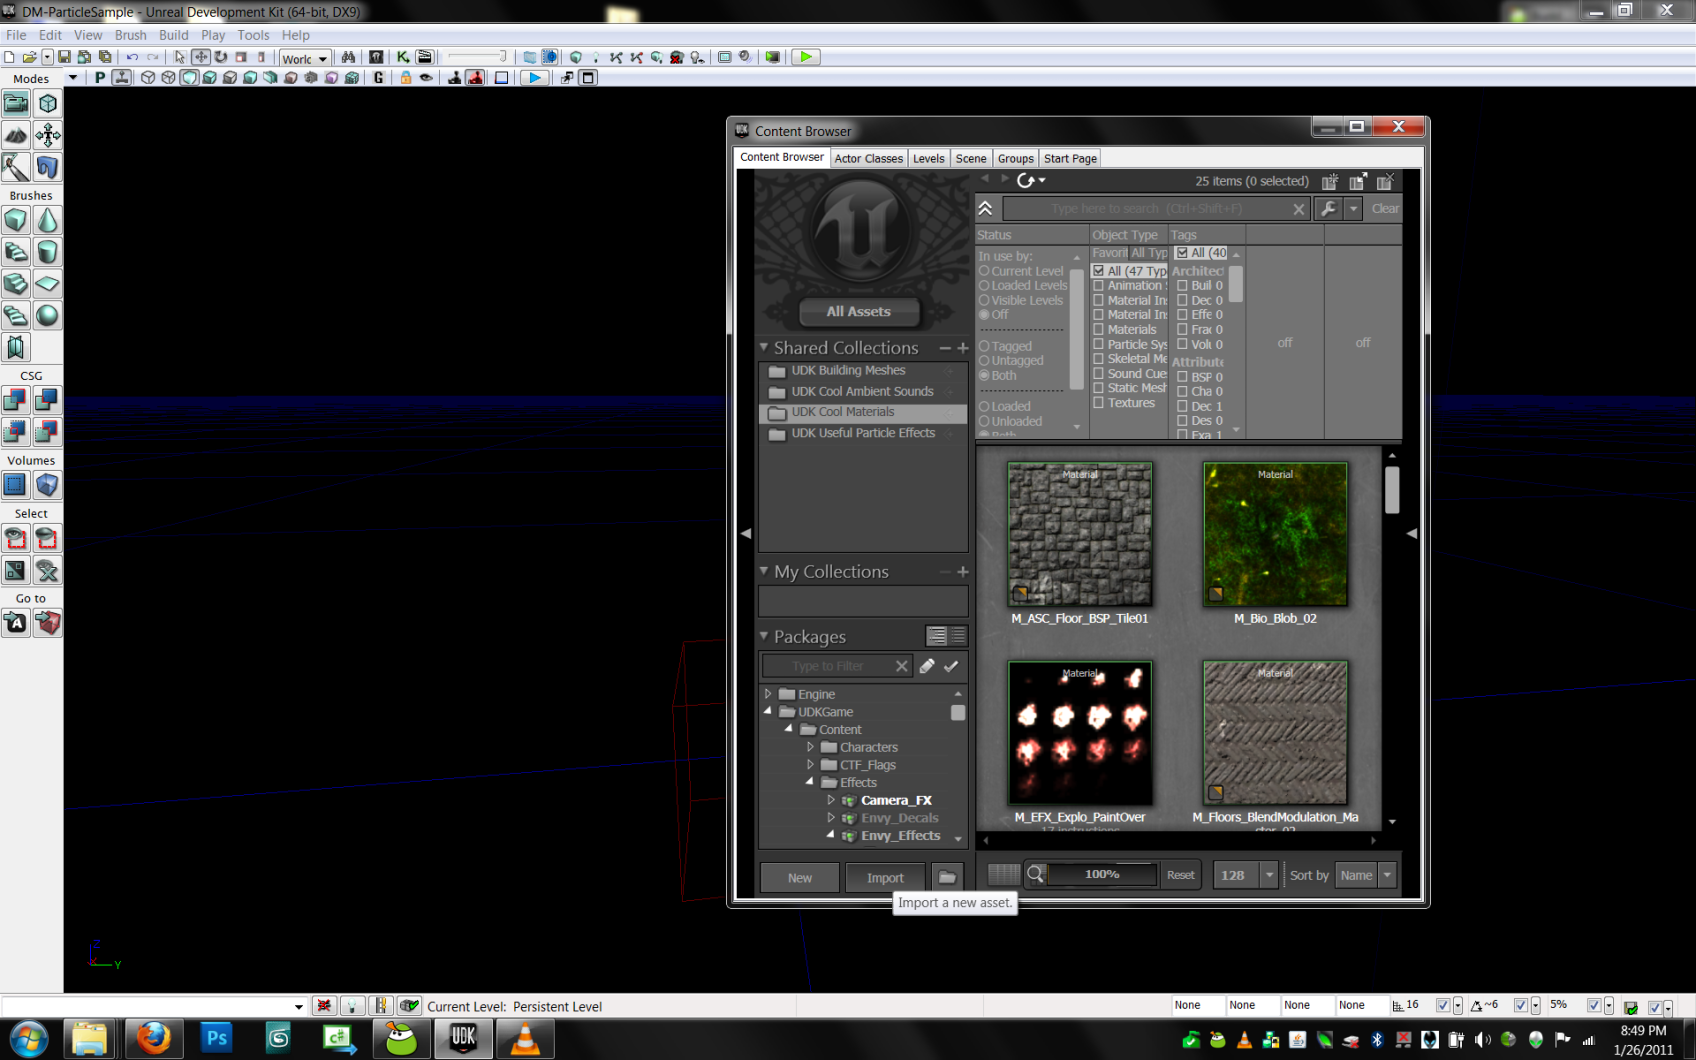
-
Open the Content Browser and click on the import button at the bottom.
- Navigate to your .TGA and click open.
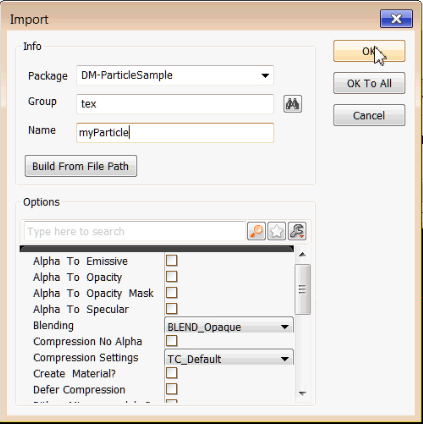
- Import the texture into the appropriate package and group, and give it an appropriate name.
Creating the Particle Material
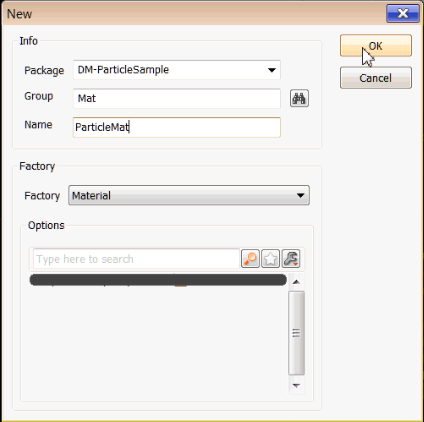
- Create a new material for your particle.
- Assign the appropriate package, group, and name, and make sure that Material is selected for your Factory, then click ok.
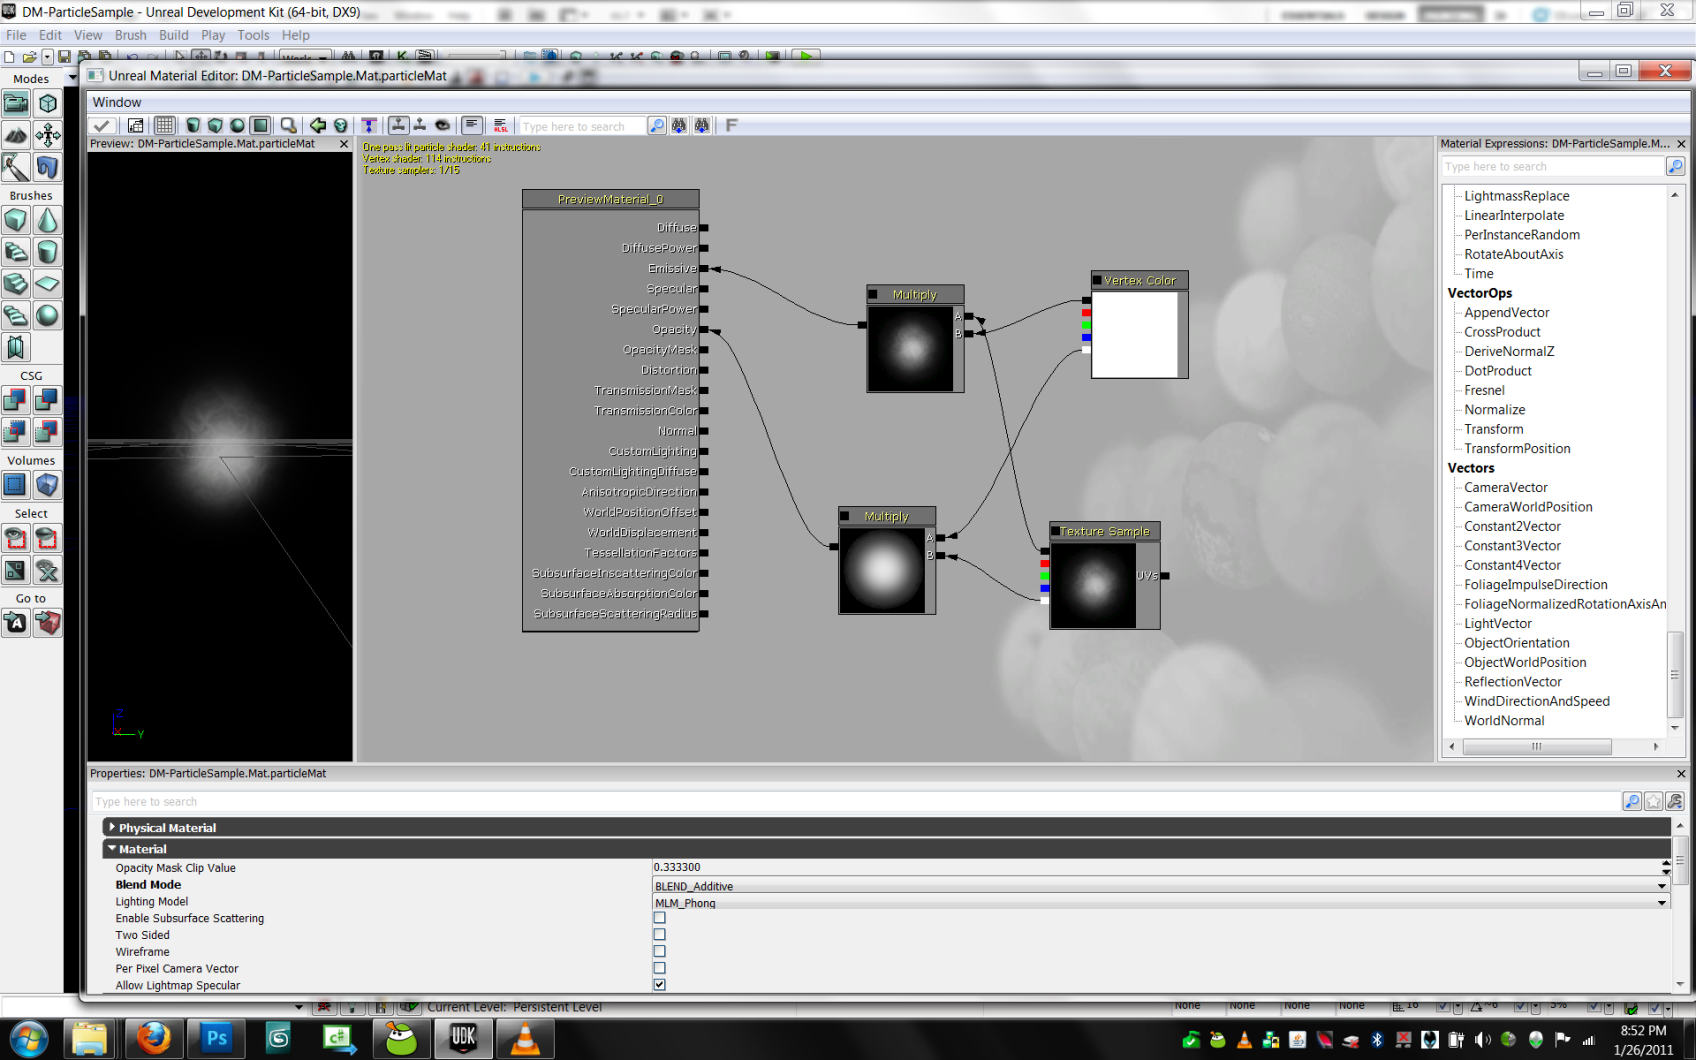
- Drag in four nodes: Vertex Color, Texture Sample, and two Multiply
- Set them up as seen above. (Note: if you did not set up an alpha channel in your file, link the red channel out from the Texture Sample instead of the white channel)
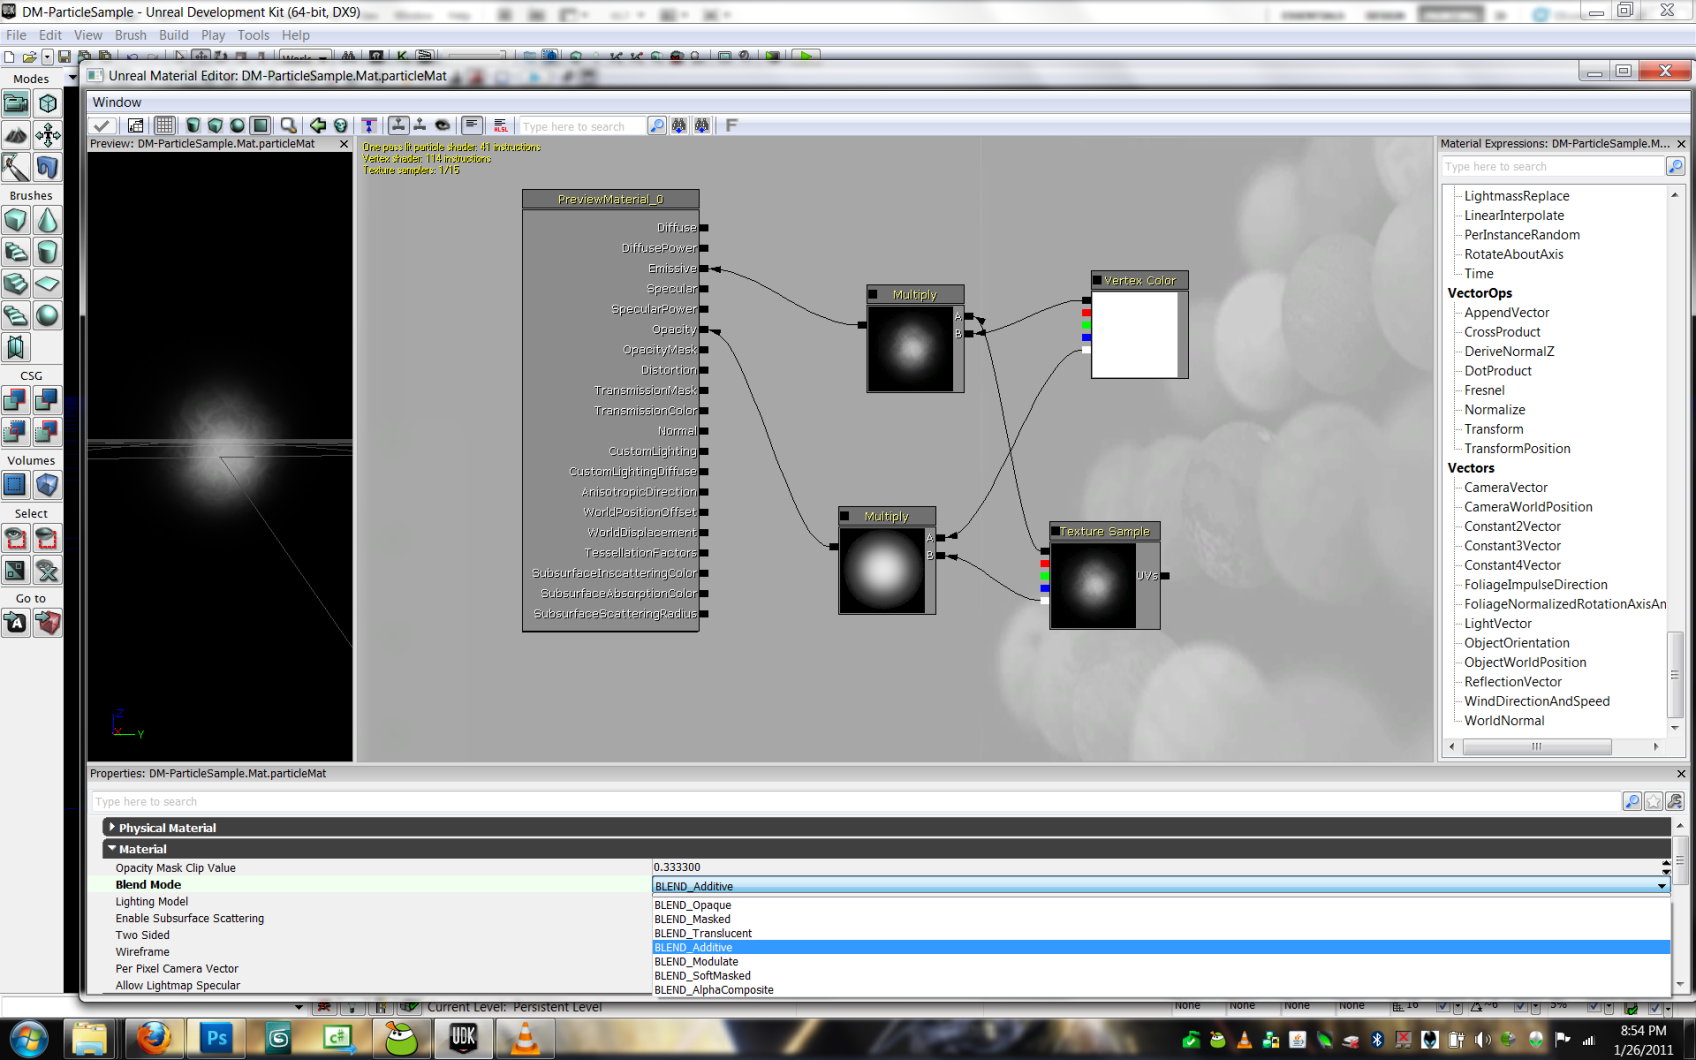
- Change your blend mode to additive. It should now show up transparent in the preview window.
- Click the green check button to compile your material.
Creating the Particle System
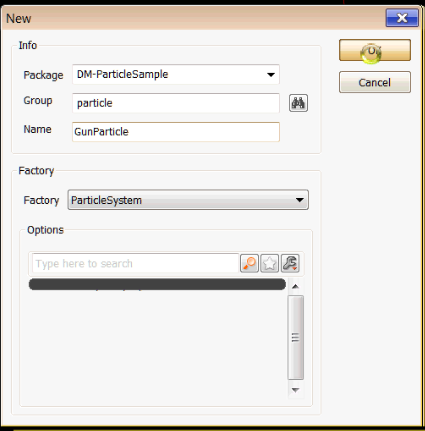
- Create a new particle system.
- Choose the appropriate package, group, and name. Make sure Particle system is selected next to Factory.
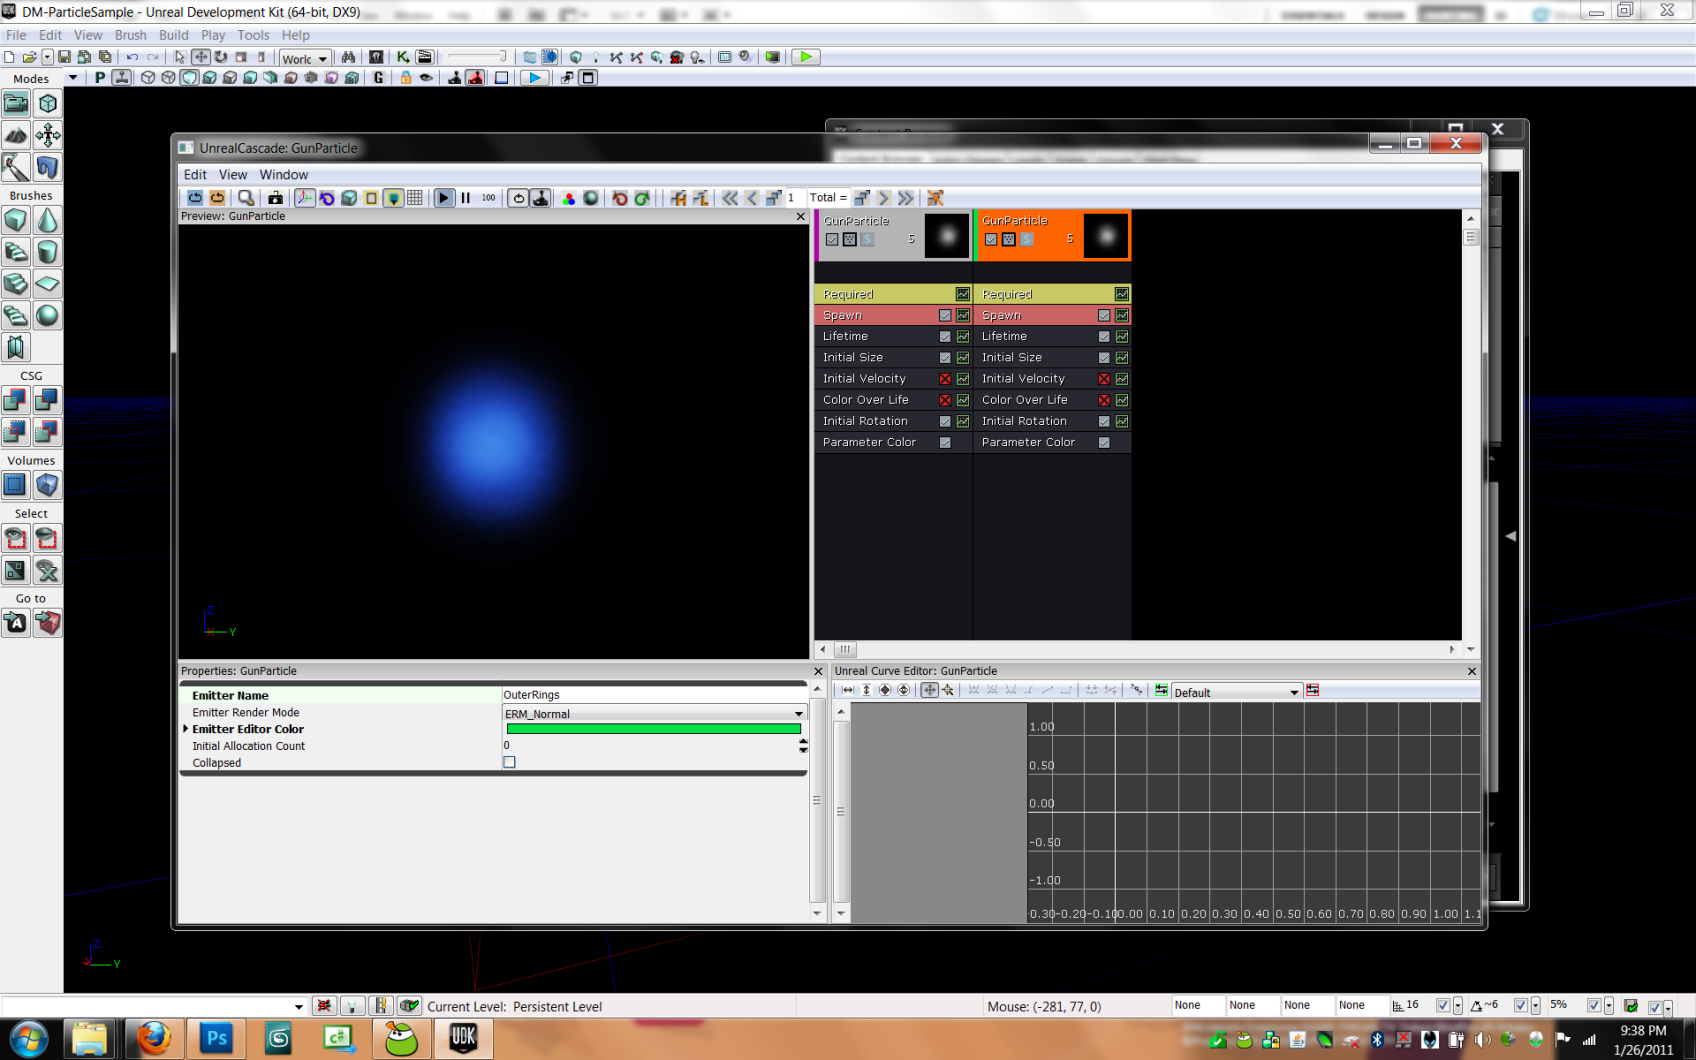
Making the Core Emitter
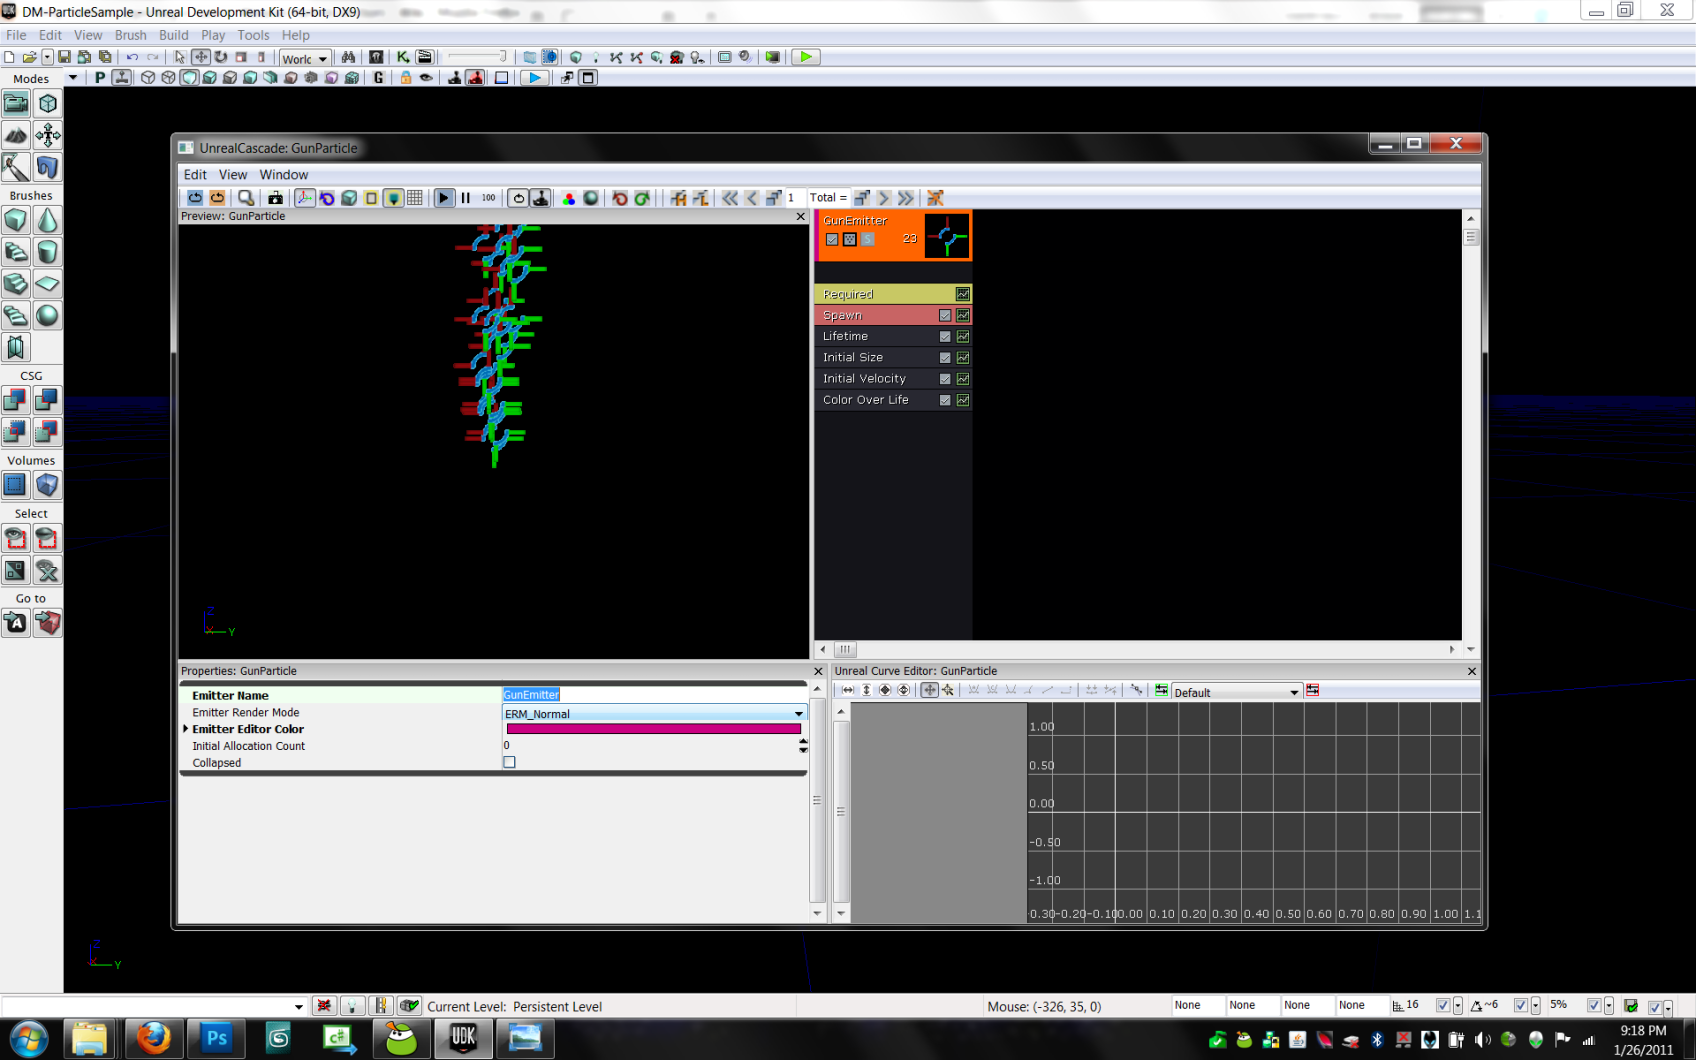
- Click on the Emitter in the top right window, and rename it in the properties window.
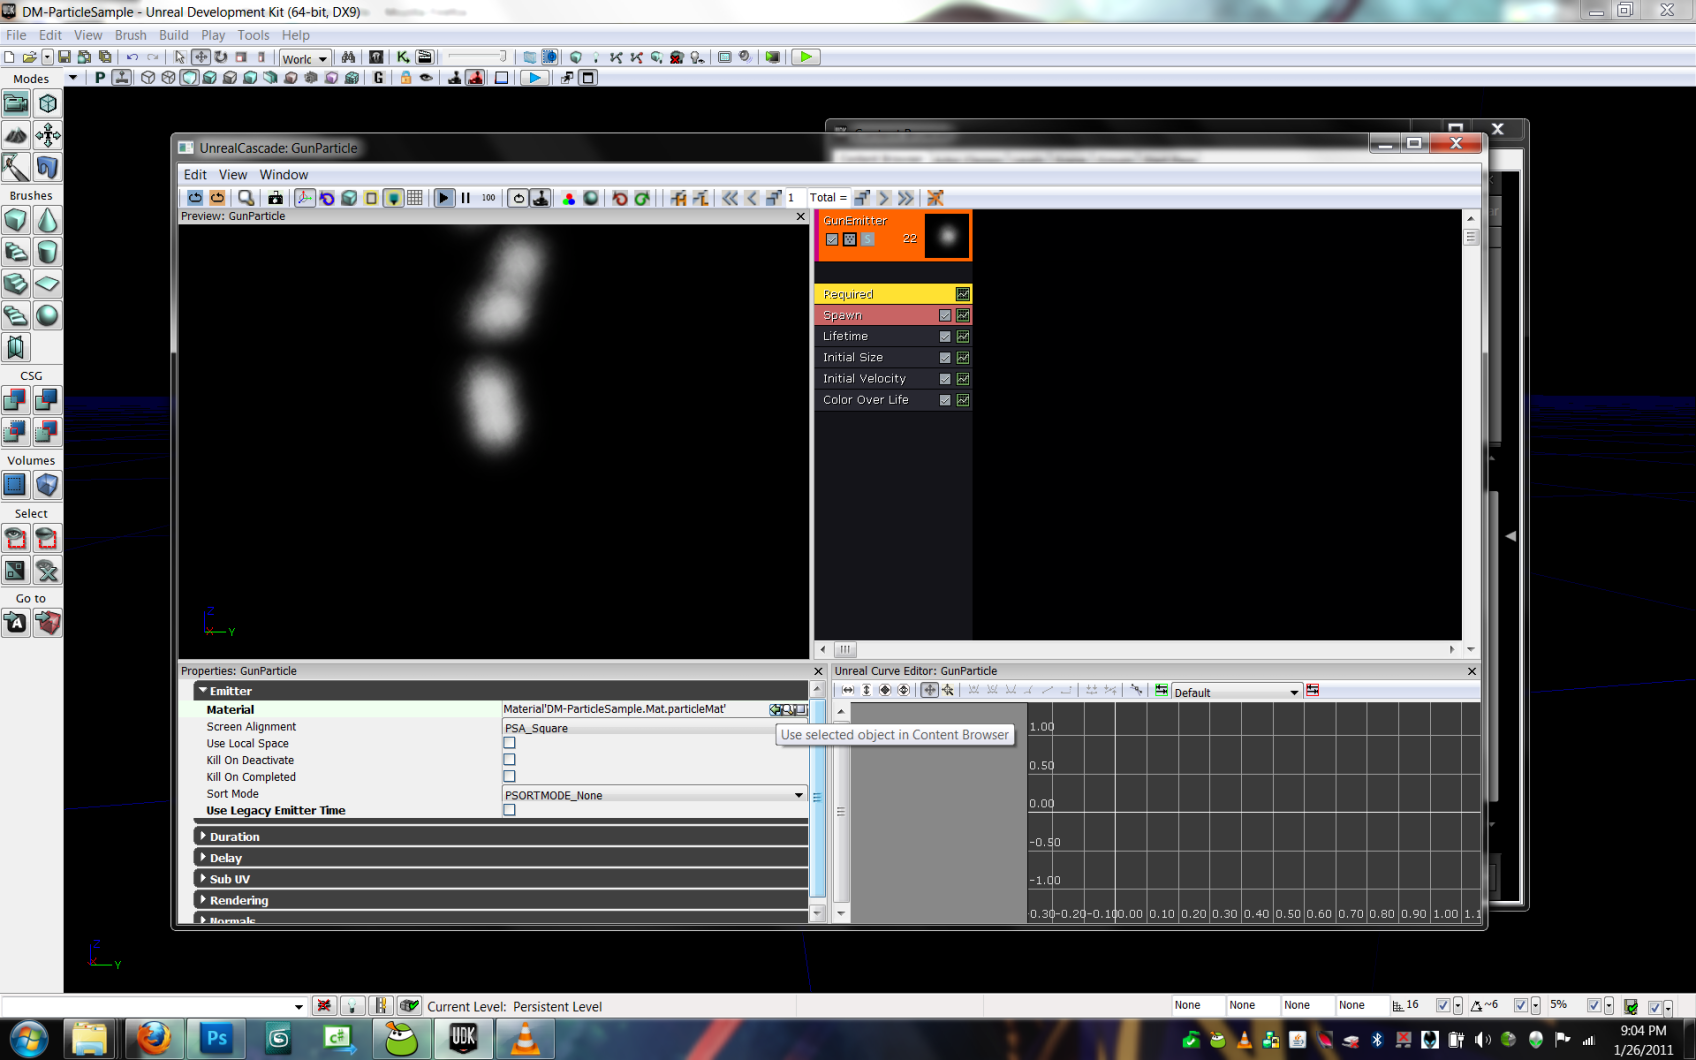
- Click on the Required module and assign your new particle material.

- Disable the Initial Velocity module.
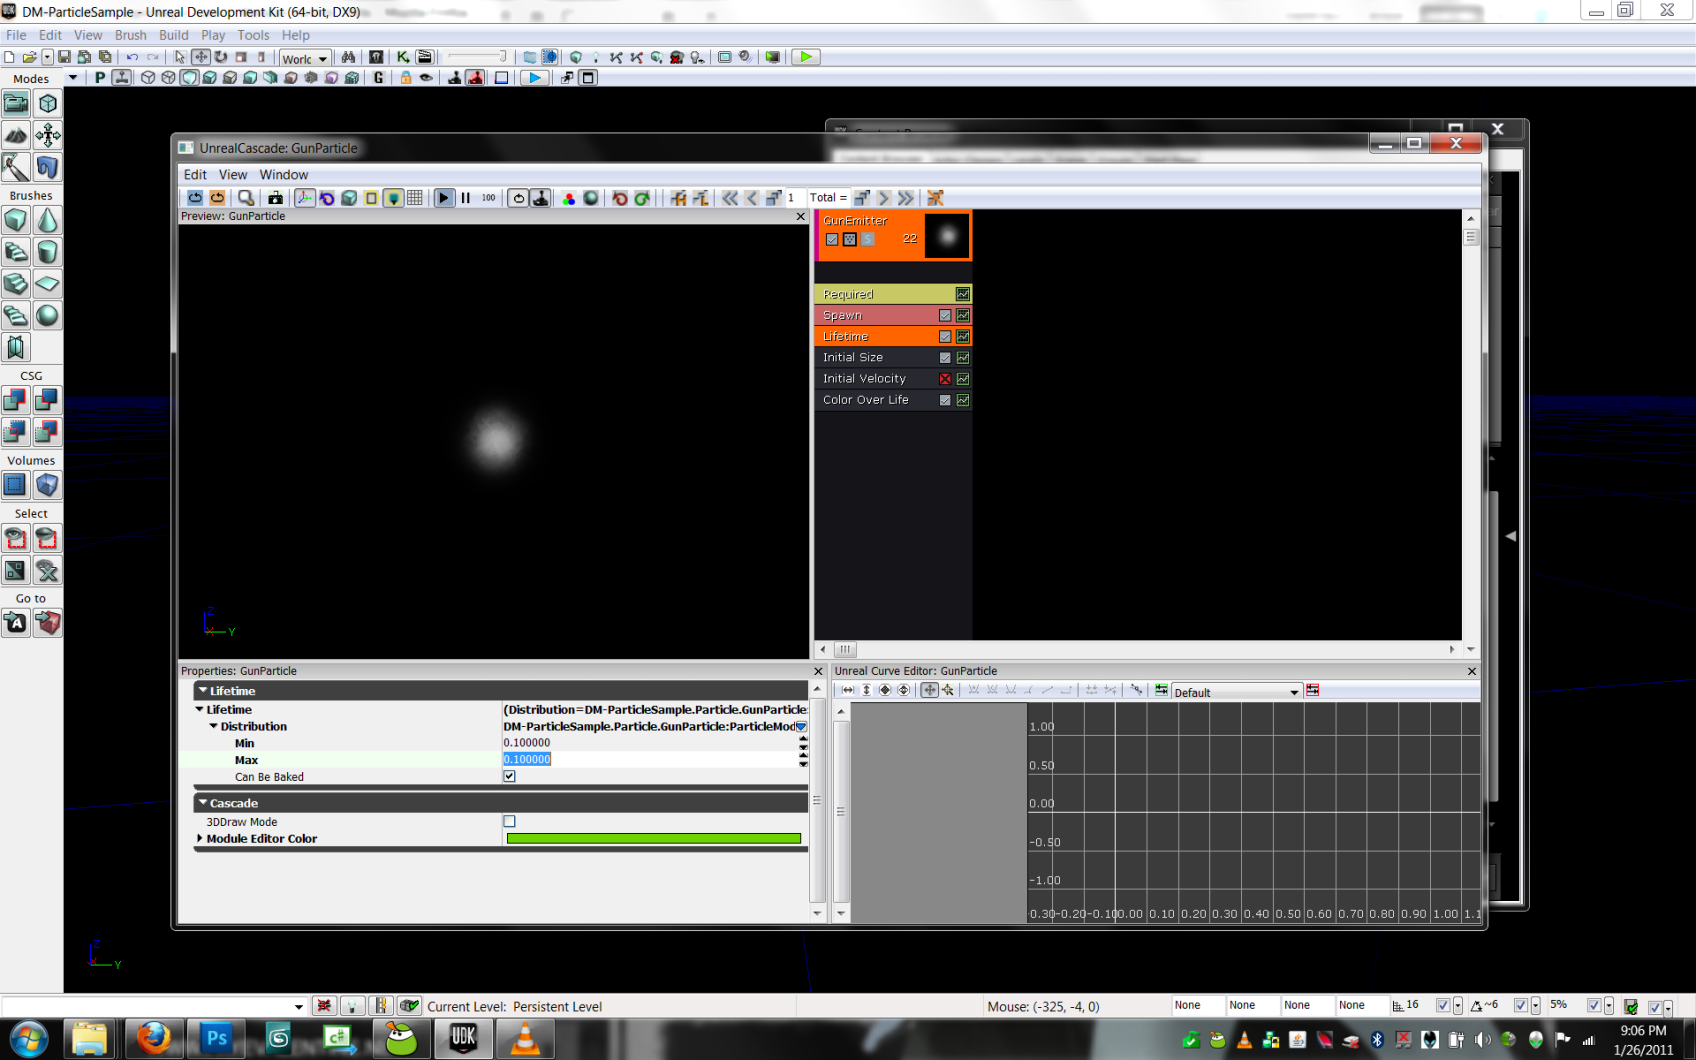
- Click on the Lifetime module and change particle Lifetime to 0.1 seconds.
-
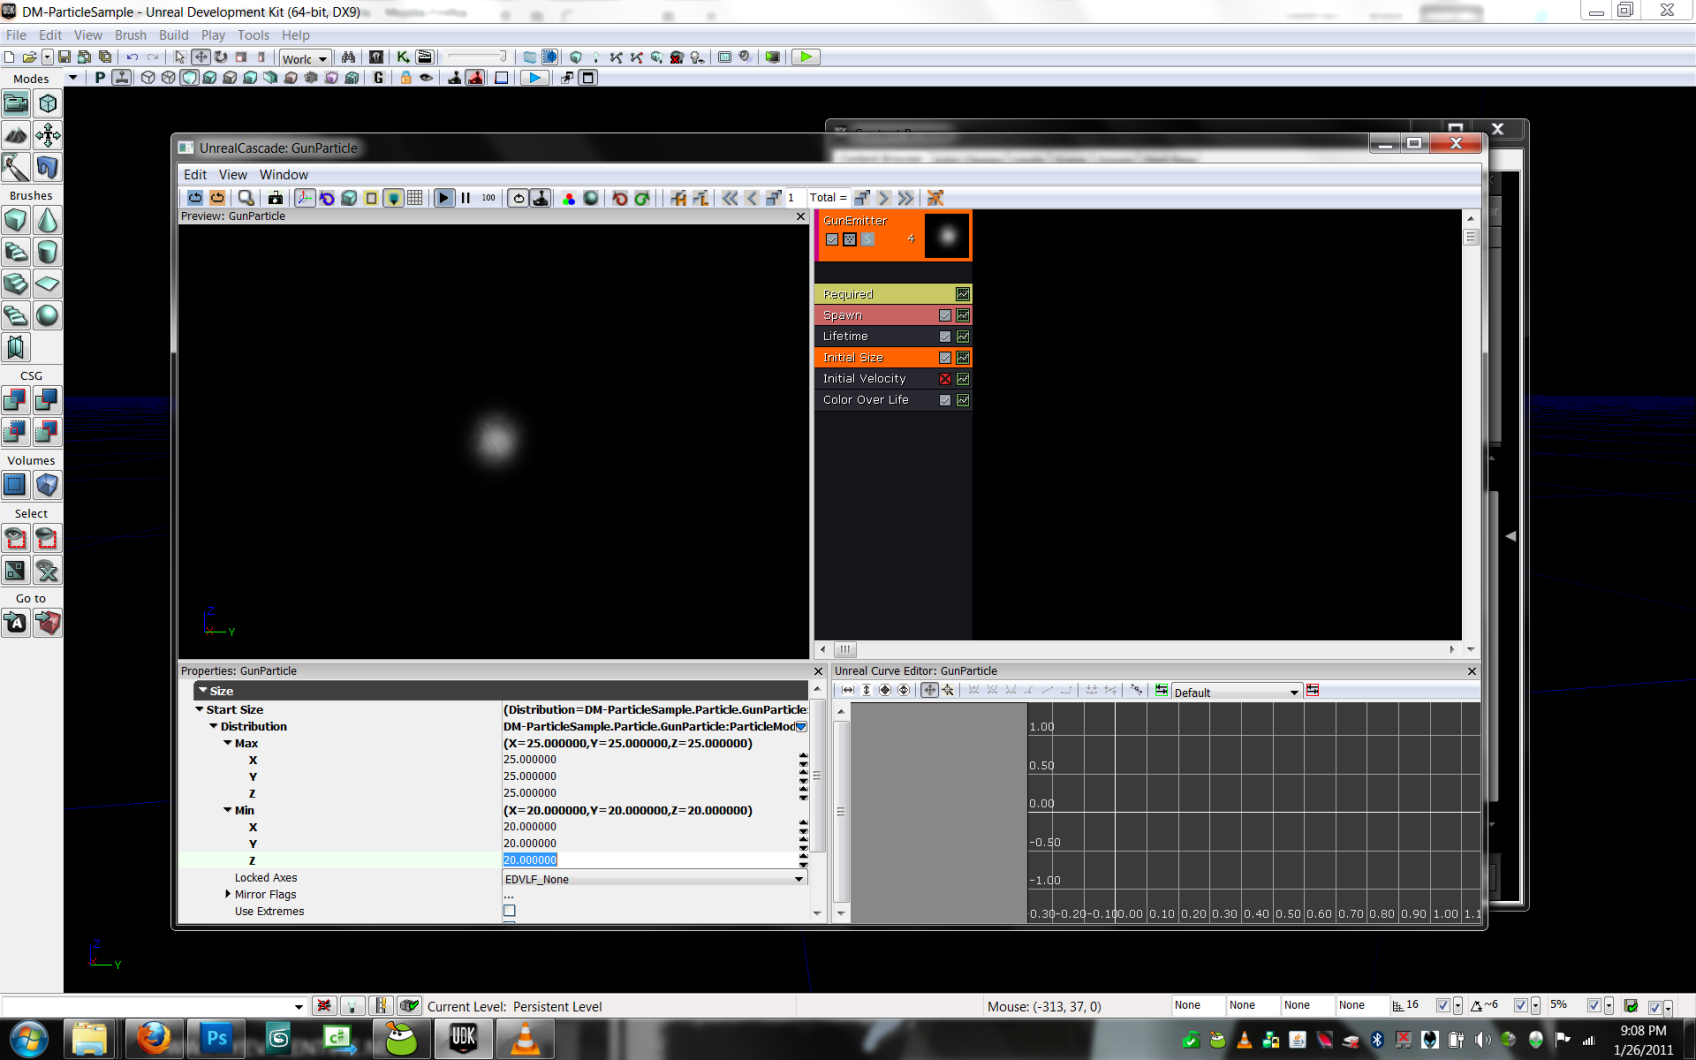
Click on the Initial Size Module and change initial size to 20-25 units.
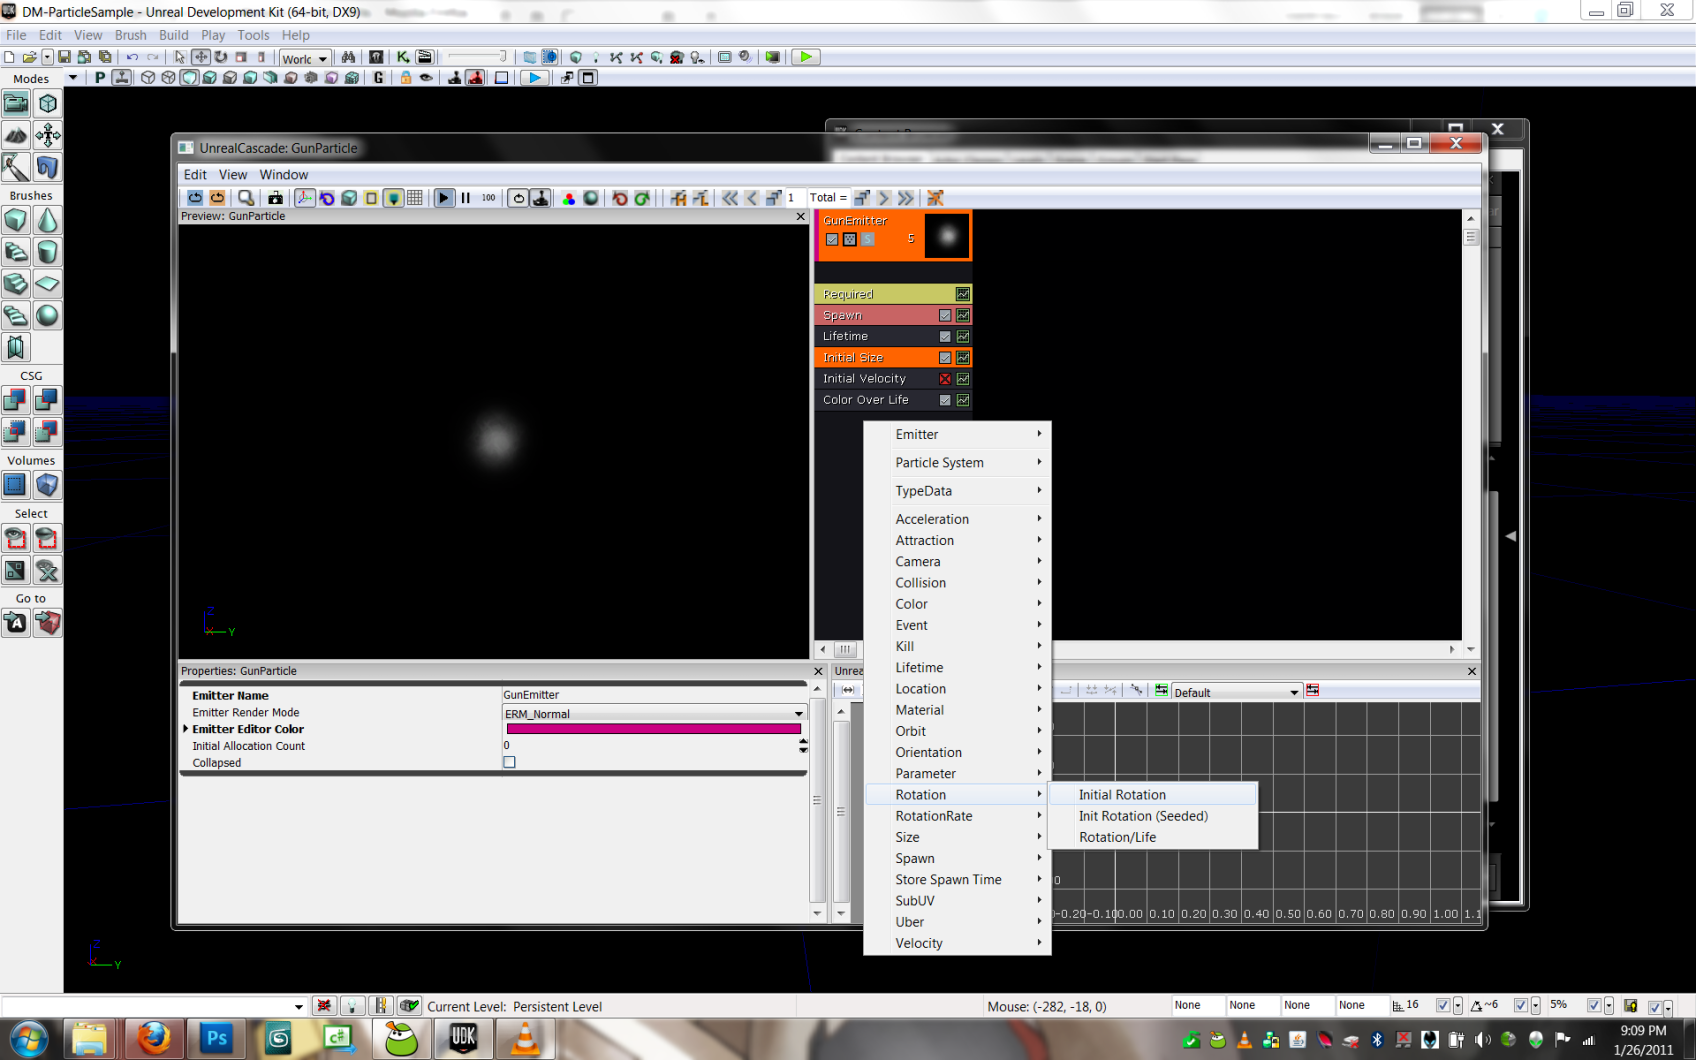
- Right click in the black area under your modules, and add an Initial Rotation module. By default, it is set to 0-1 units.
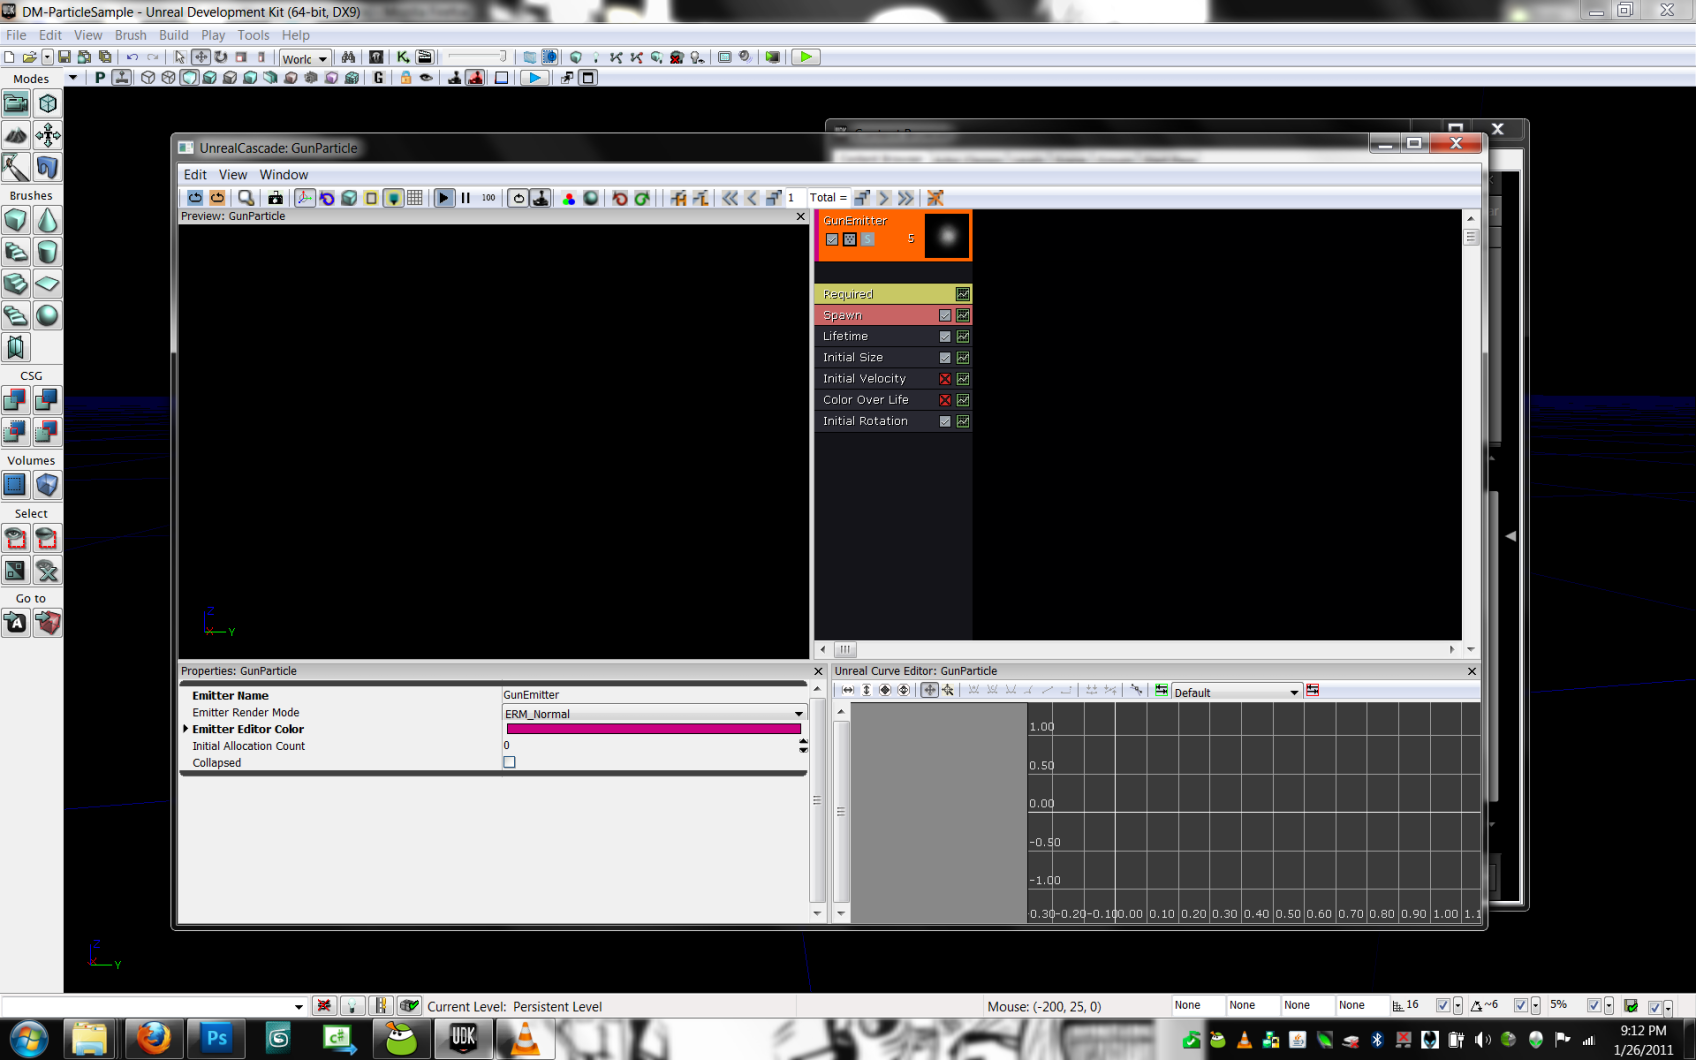
- Disable the Color Over Life module.
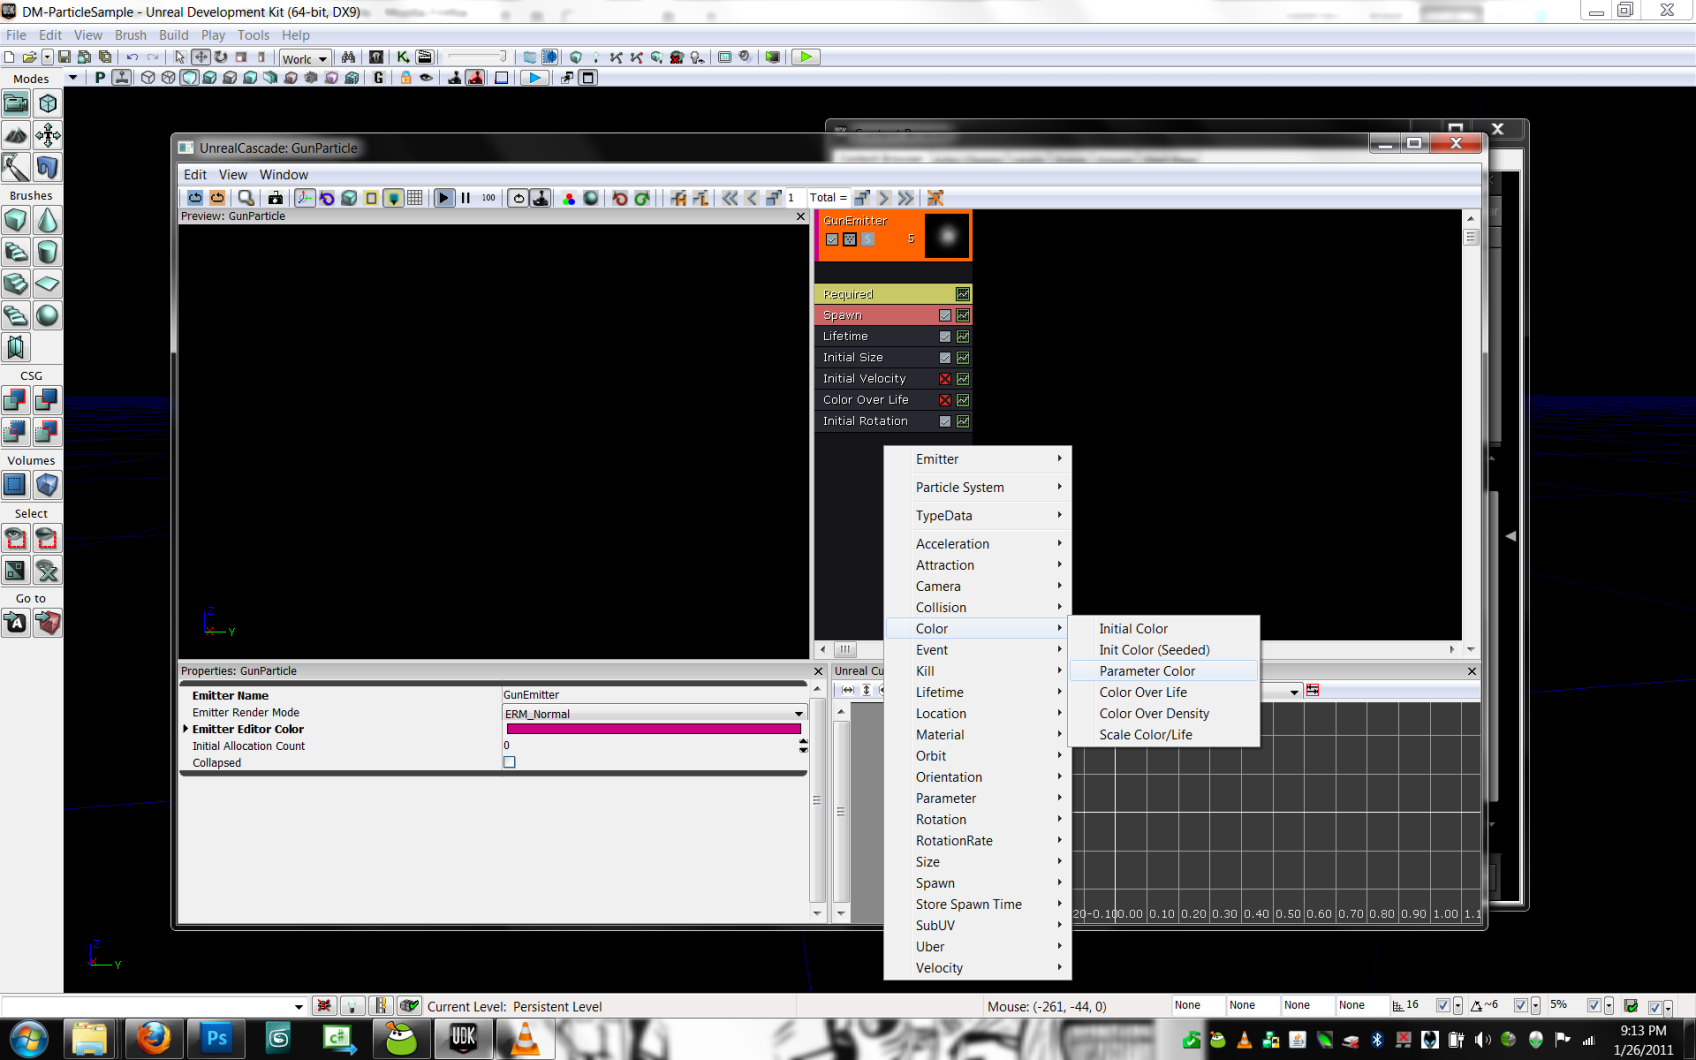
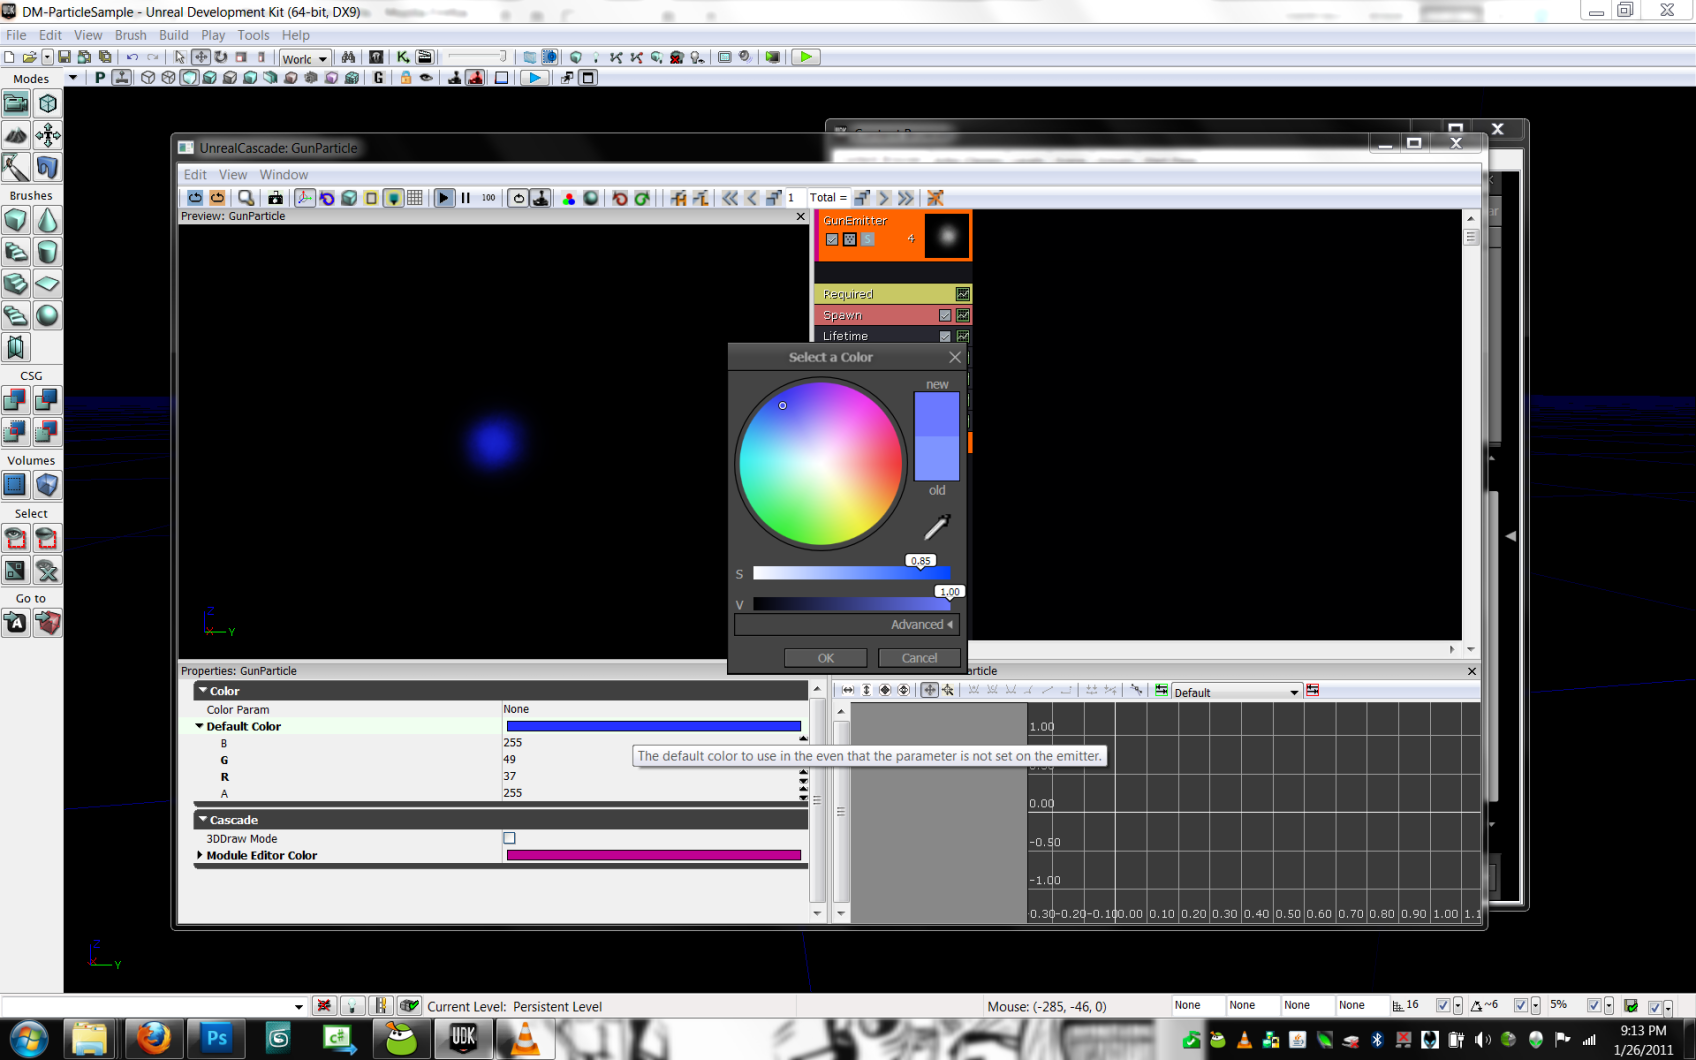
- Right click in the black area under your modules, and add a Parameter Color module and choose your particle's color.
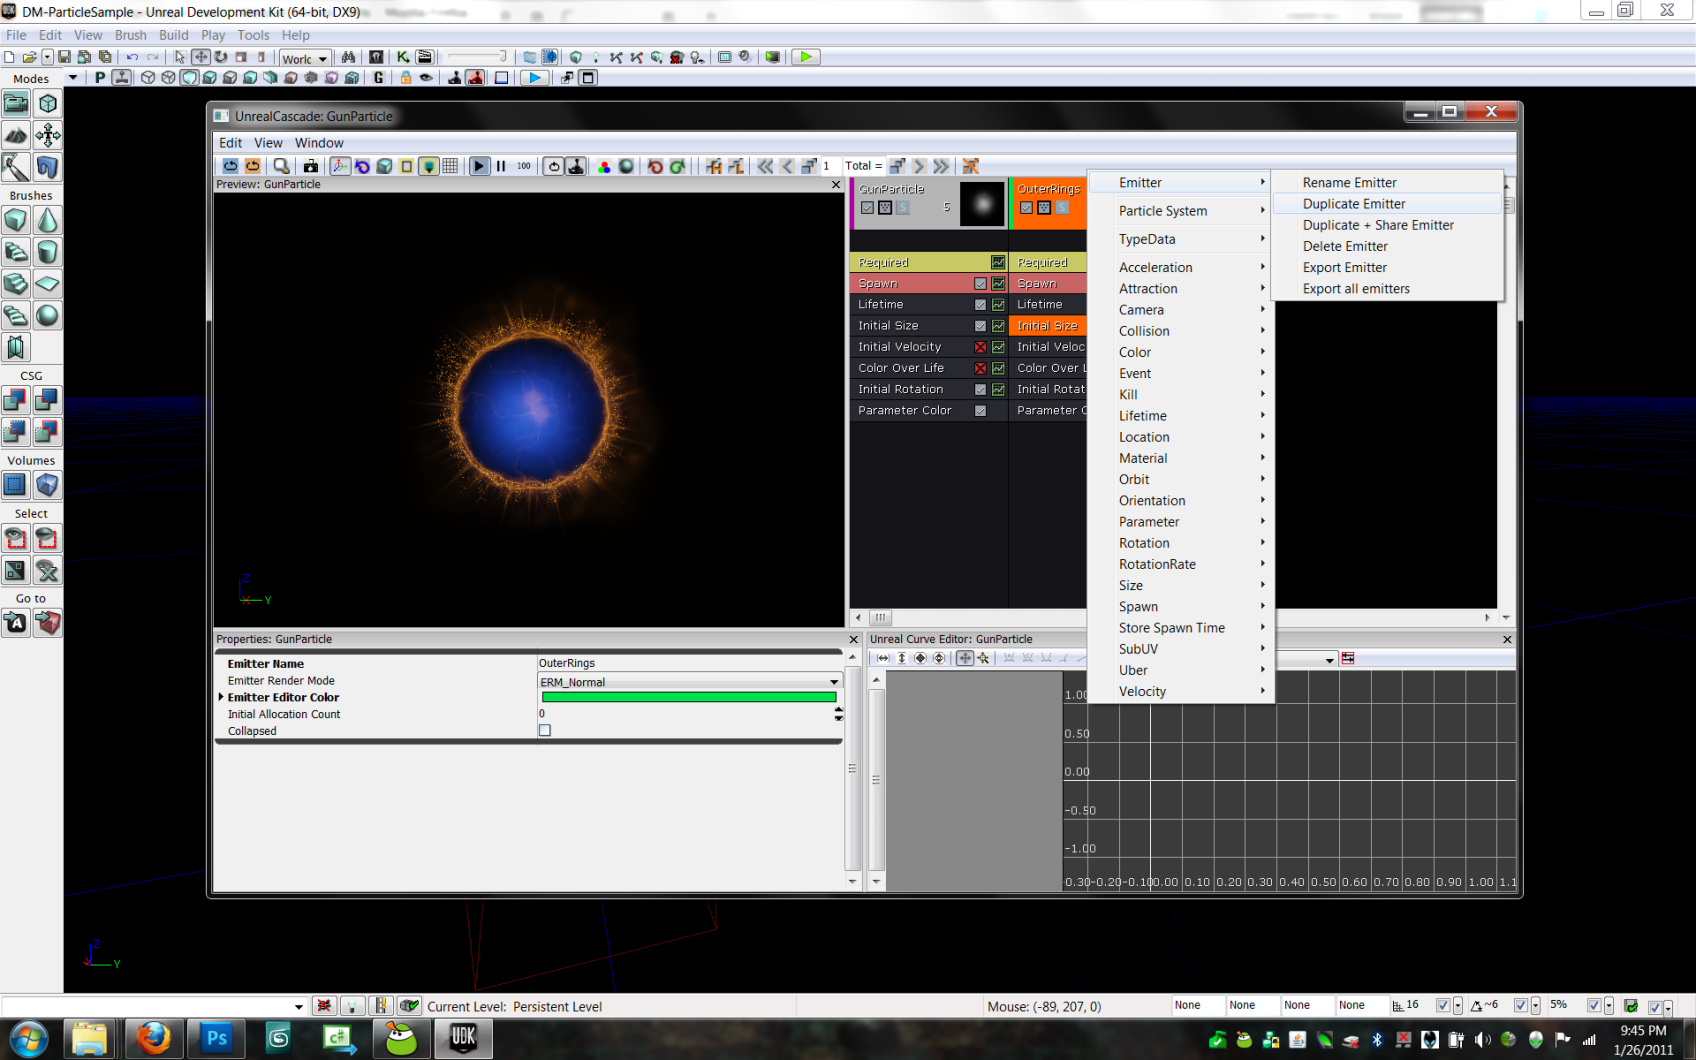
Making the Outer Ring Emitter
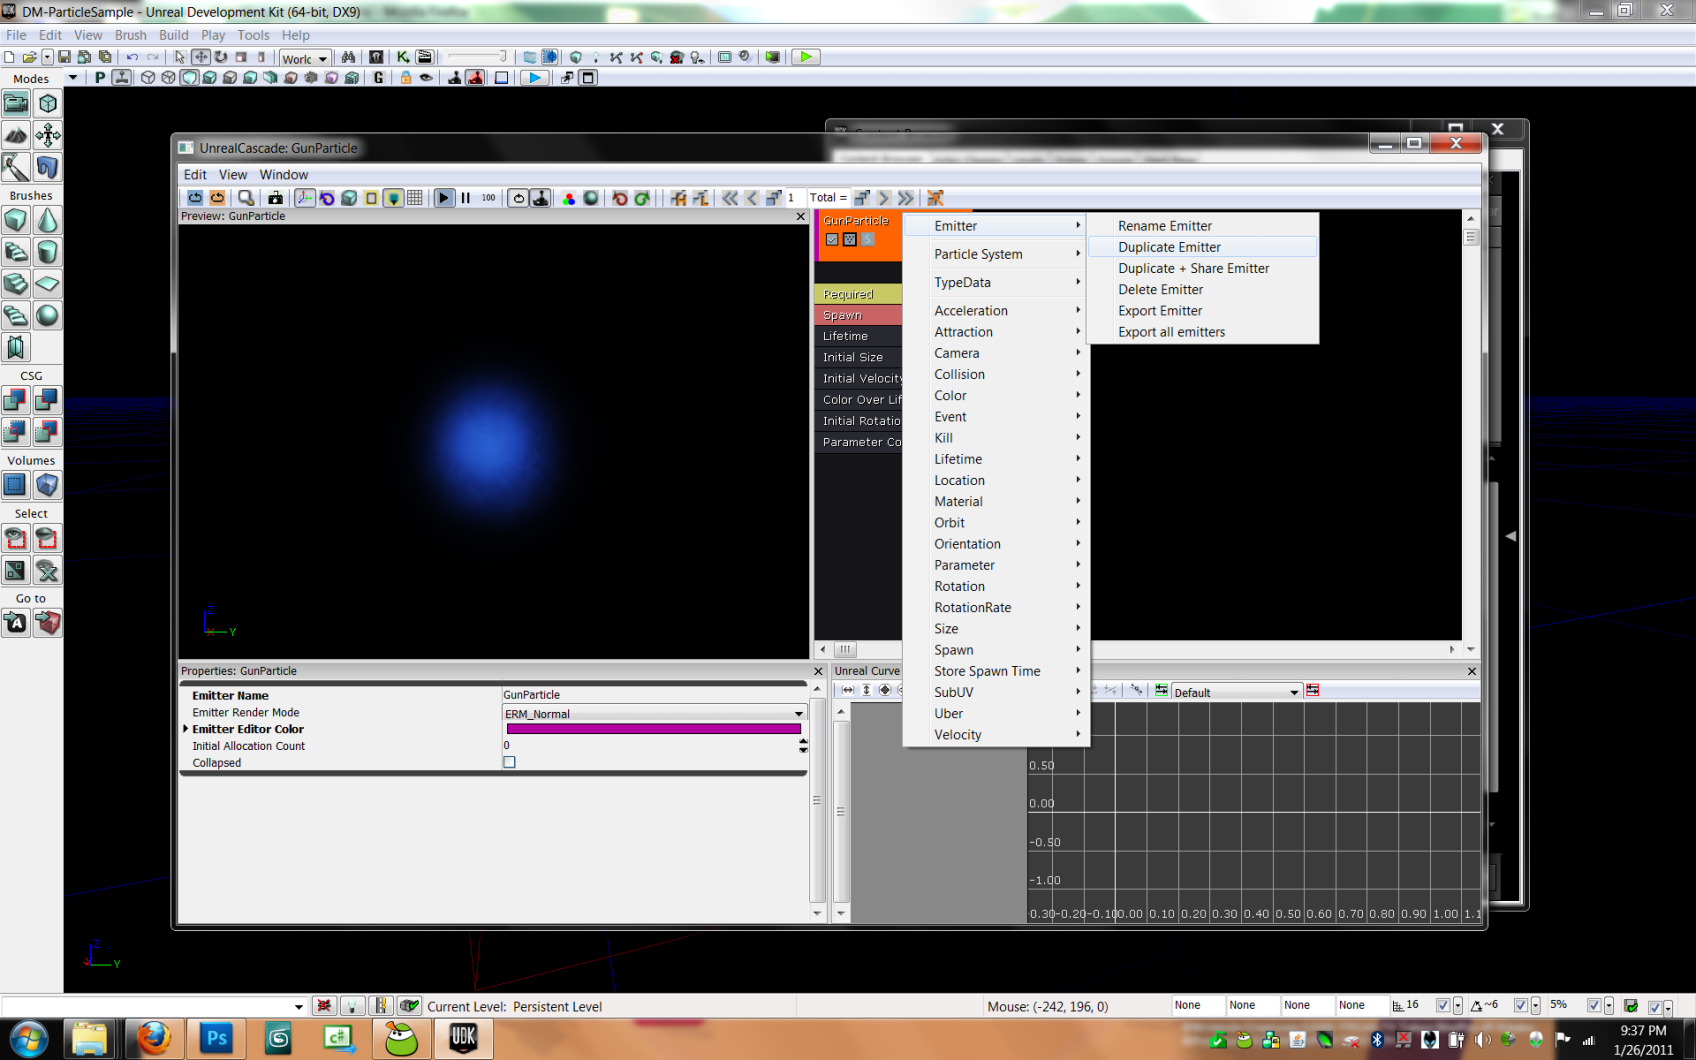
- Right click on the first emitter and duplicate it.
- Click on the new emitter and rename it.
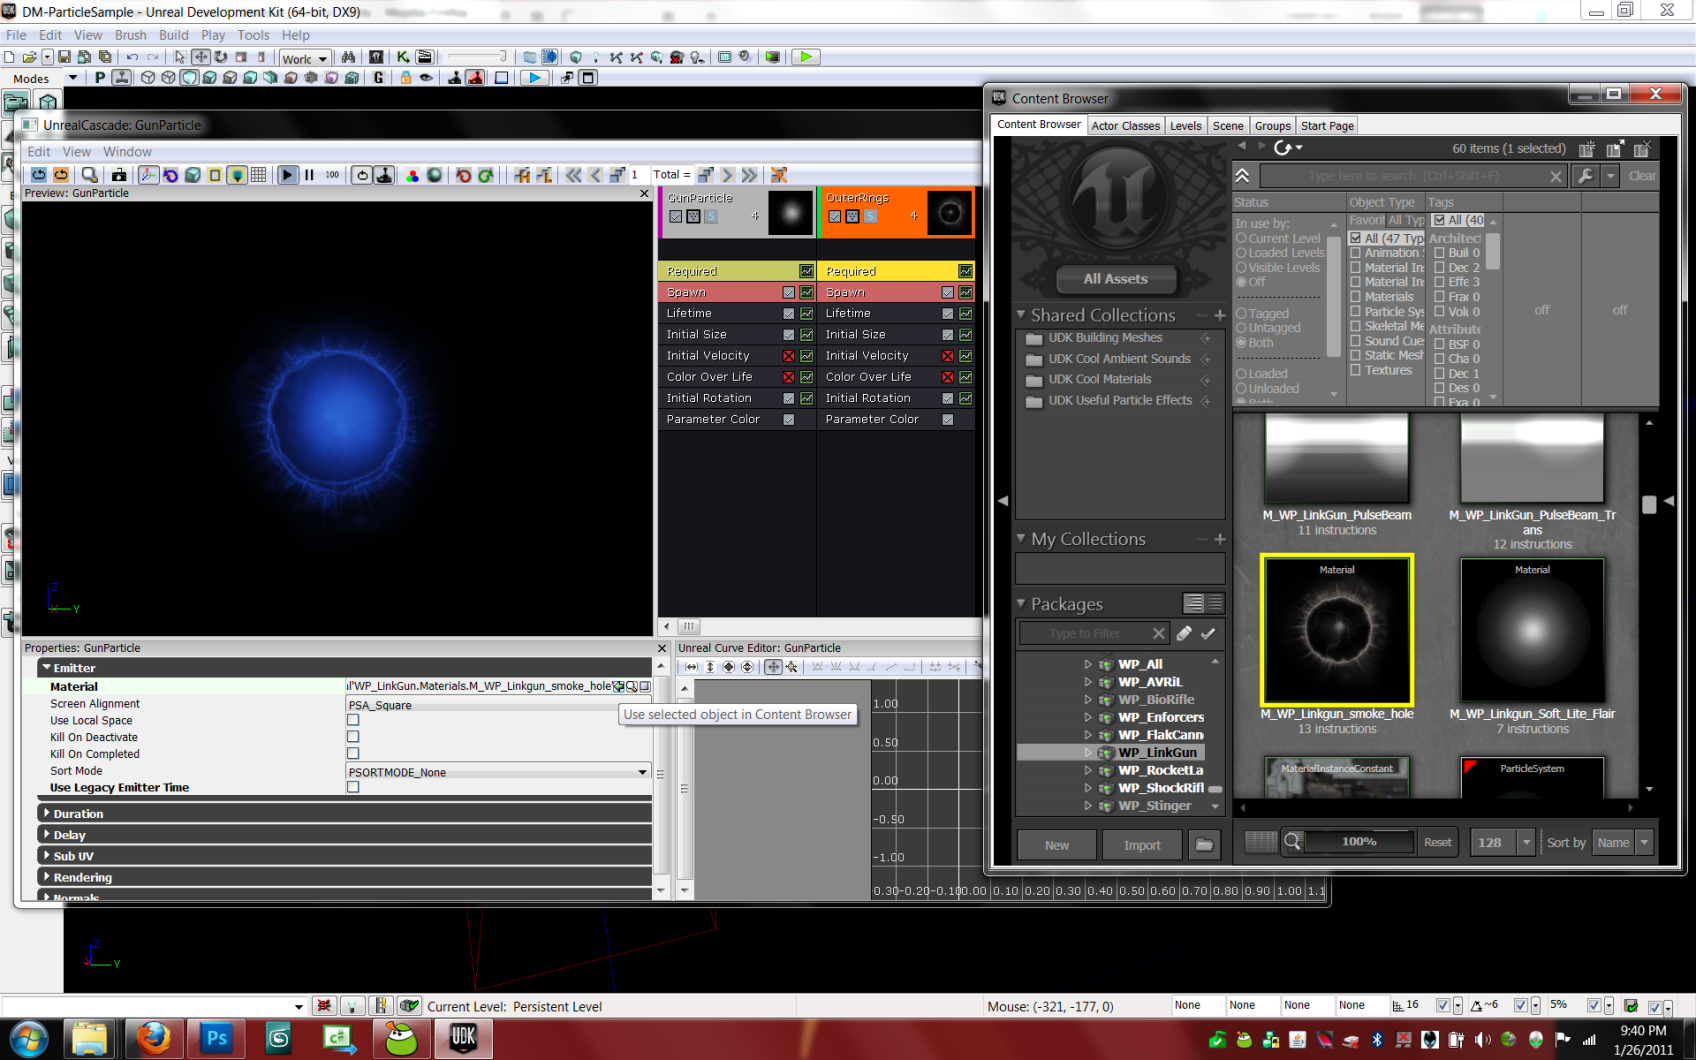
- Find the M_WP_Linkgun_smoke_hole material in the Content Browser and assign it under the Required module. (It is in the Link gun package)
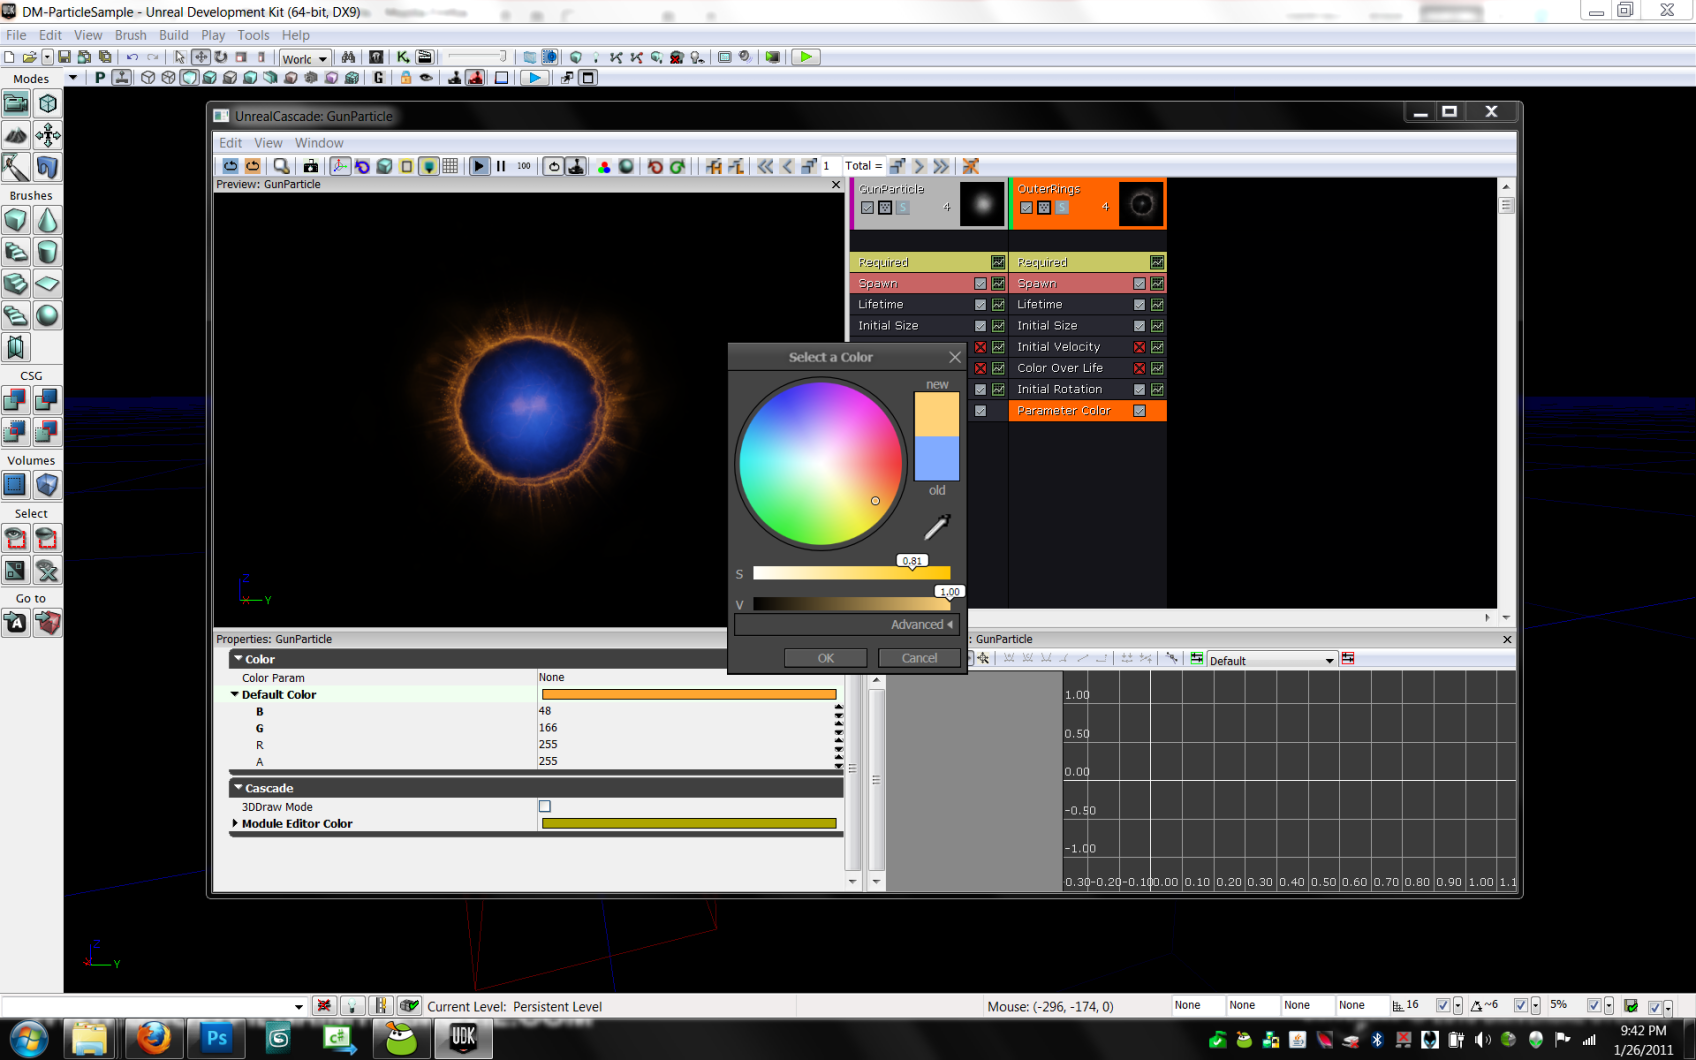
- Click on the Parameter Color module and change it.
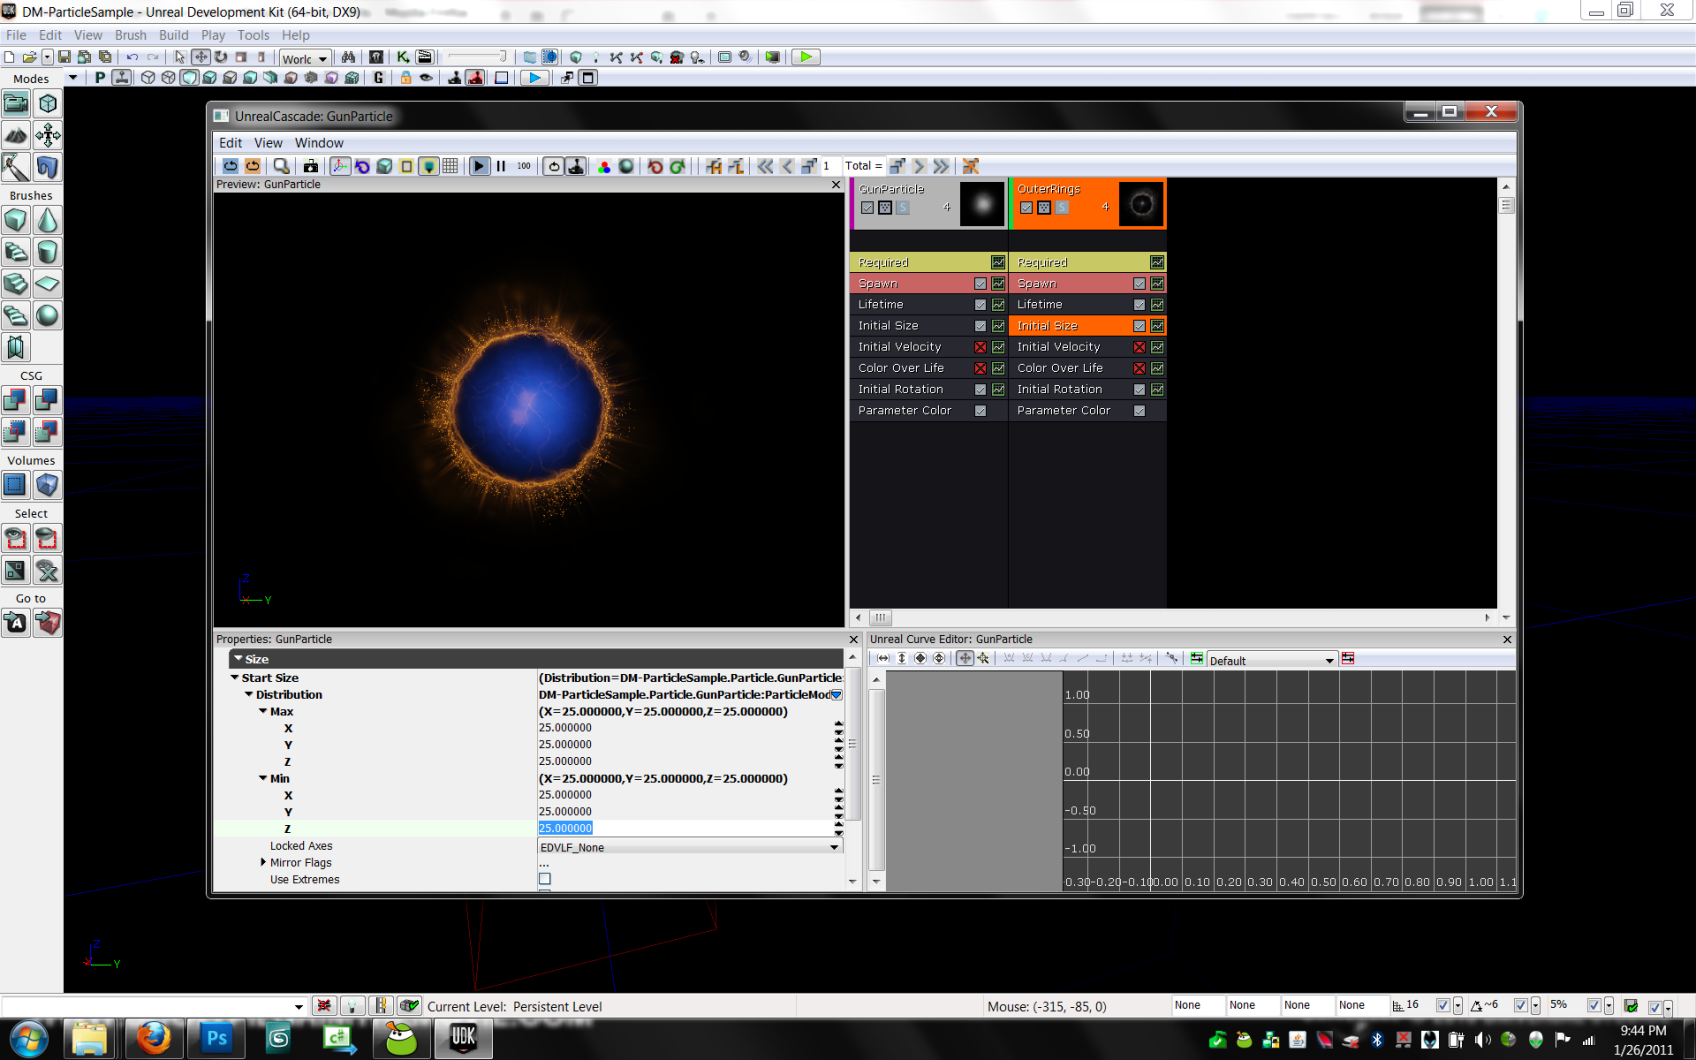
- Click on the Initial Size module and change it to 25
Making the Inner Rings Emitter
- Right click on the second emitter and duplicate it.
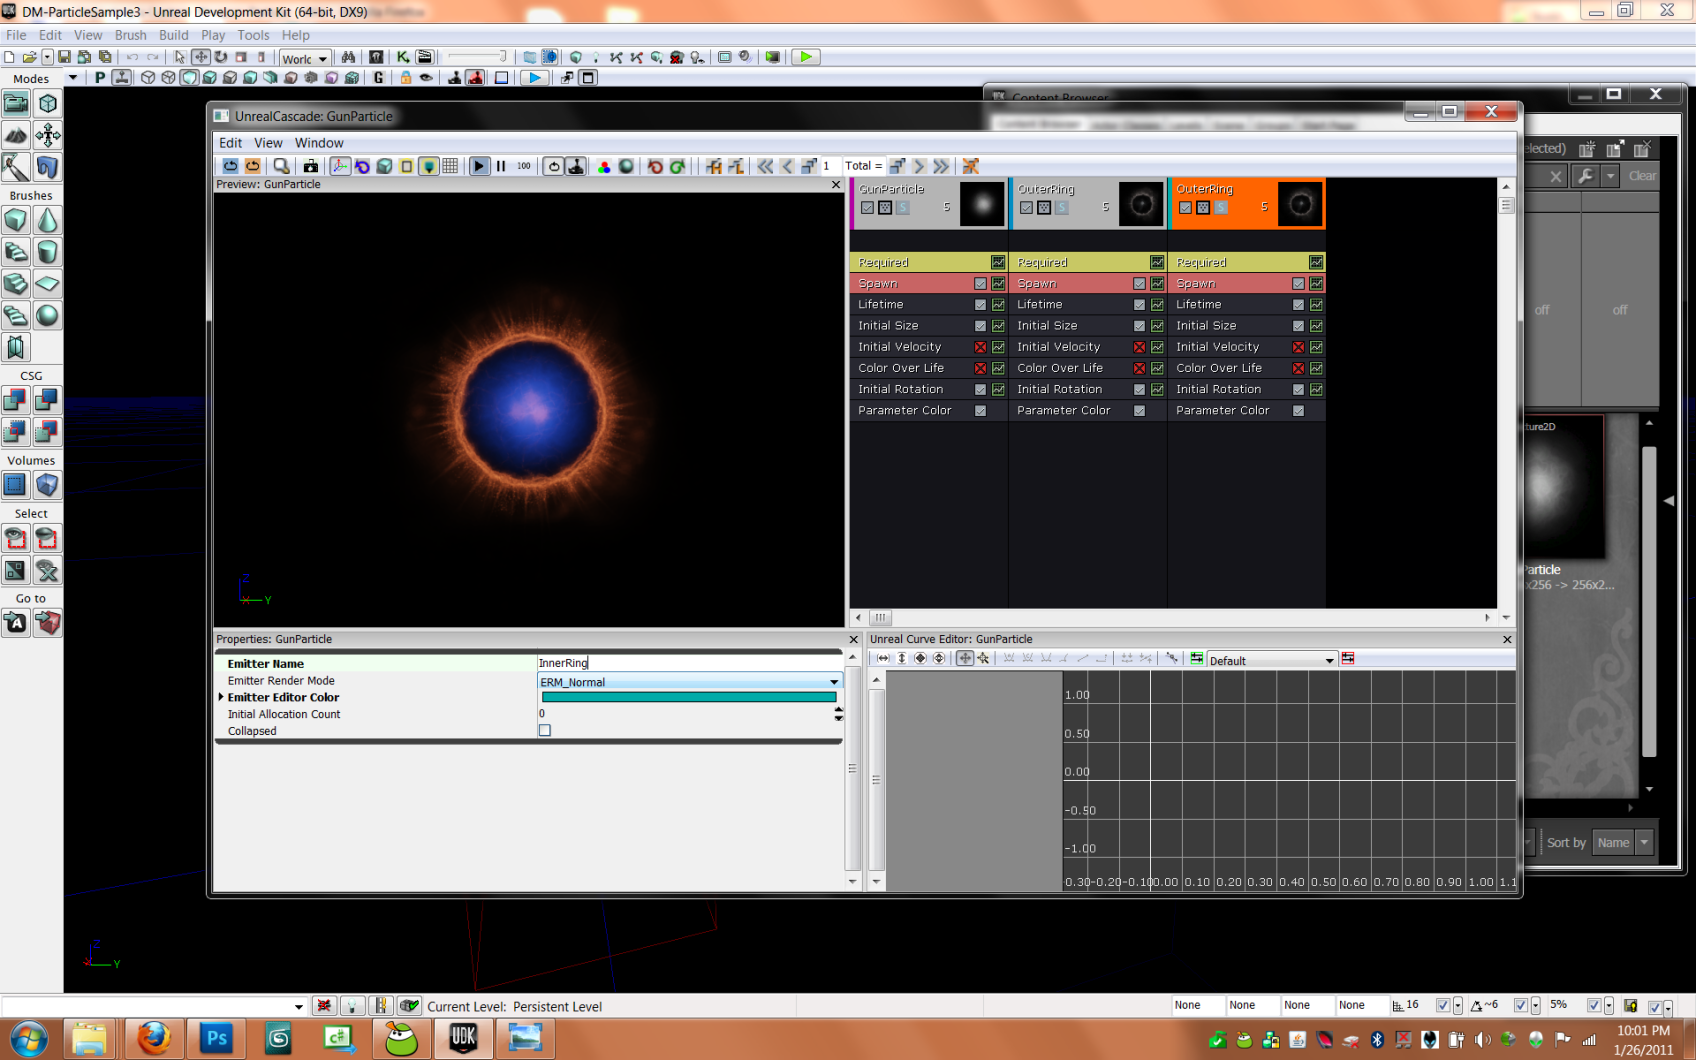
- Click on the new emitter and rename it.
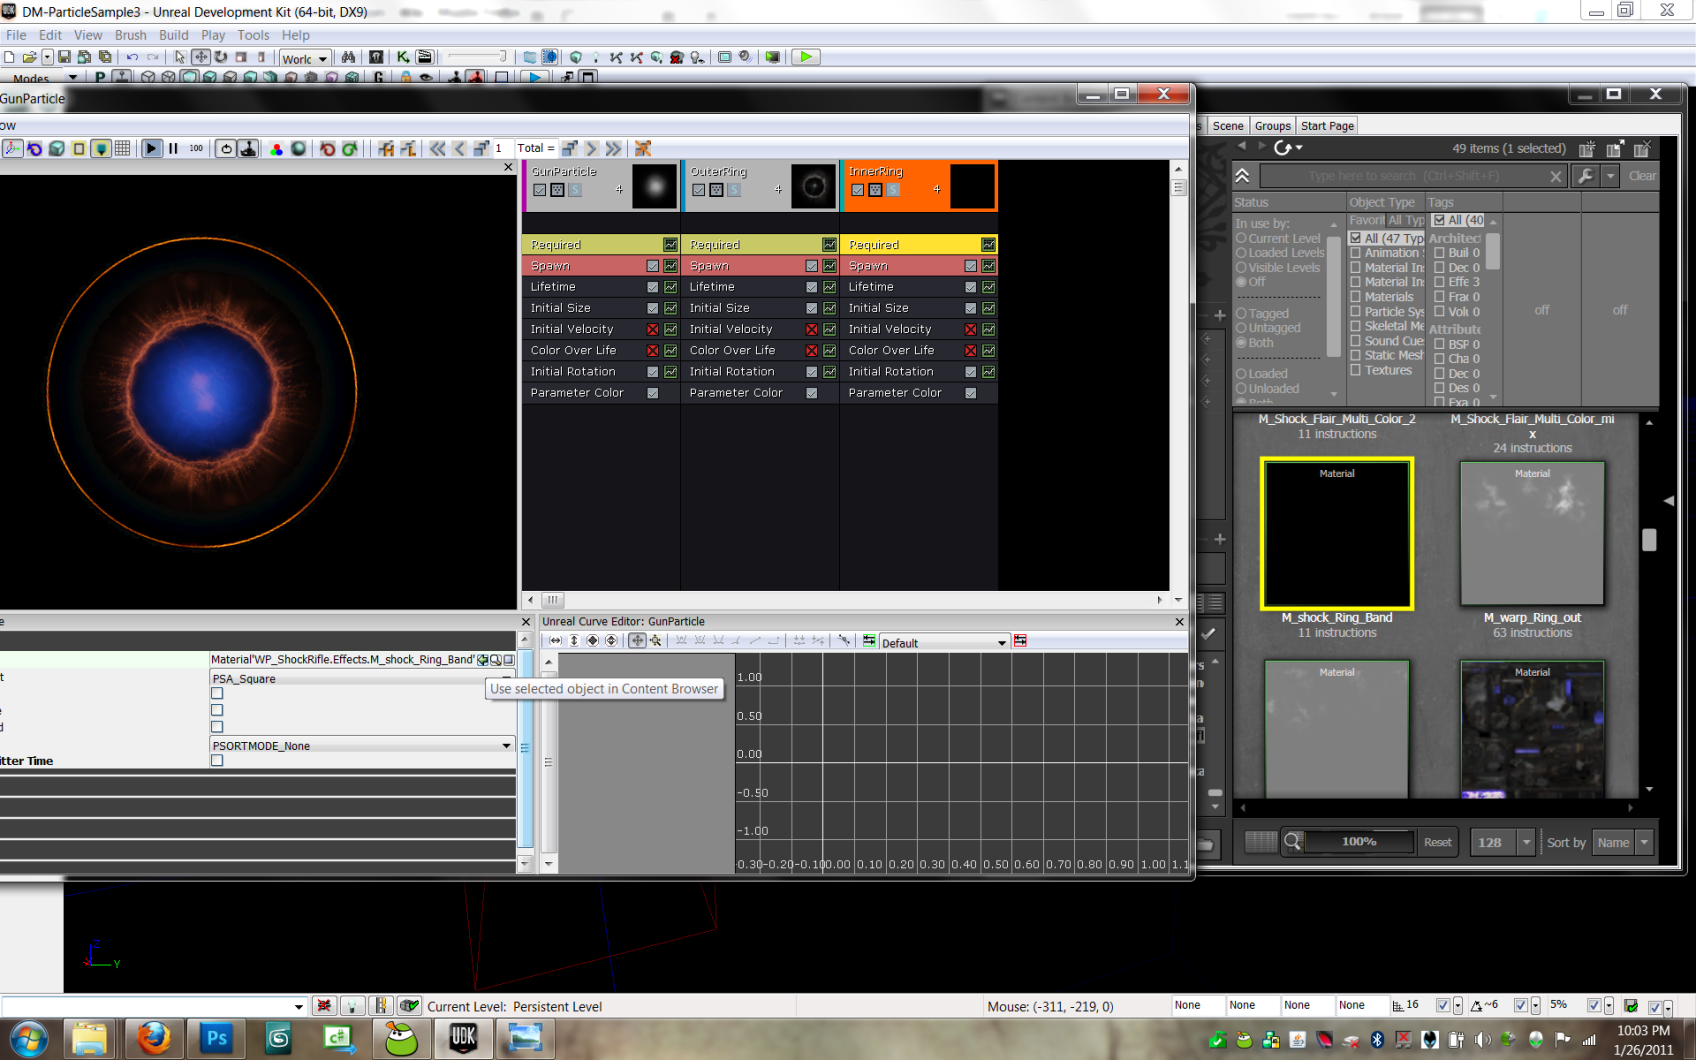
- Find the M_shock_Ring_Band material in the Content Browser and assign it under the Required module. (It is in the Shock Rifle package)
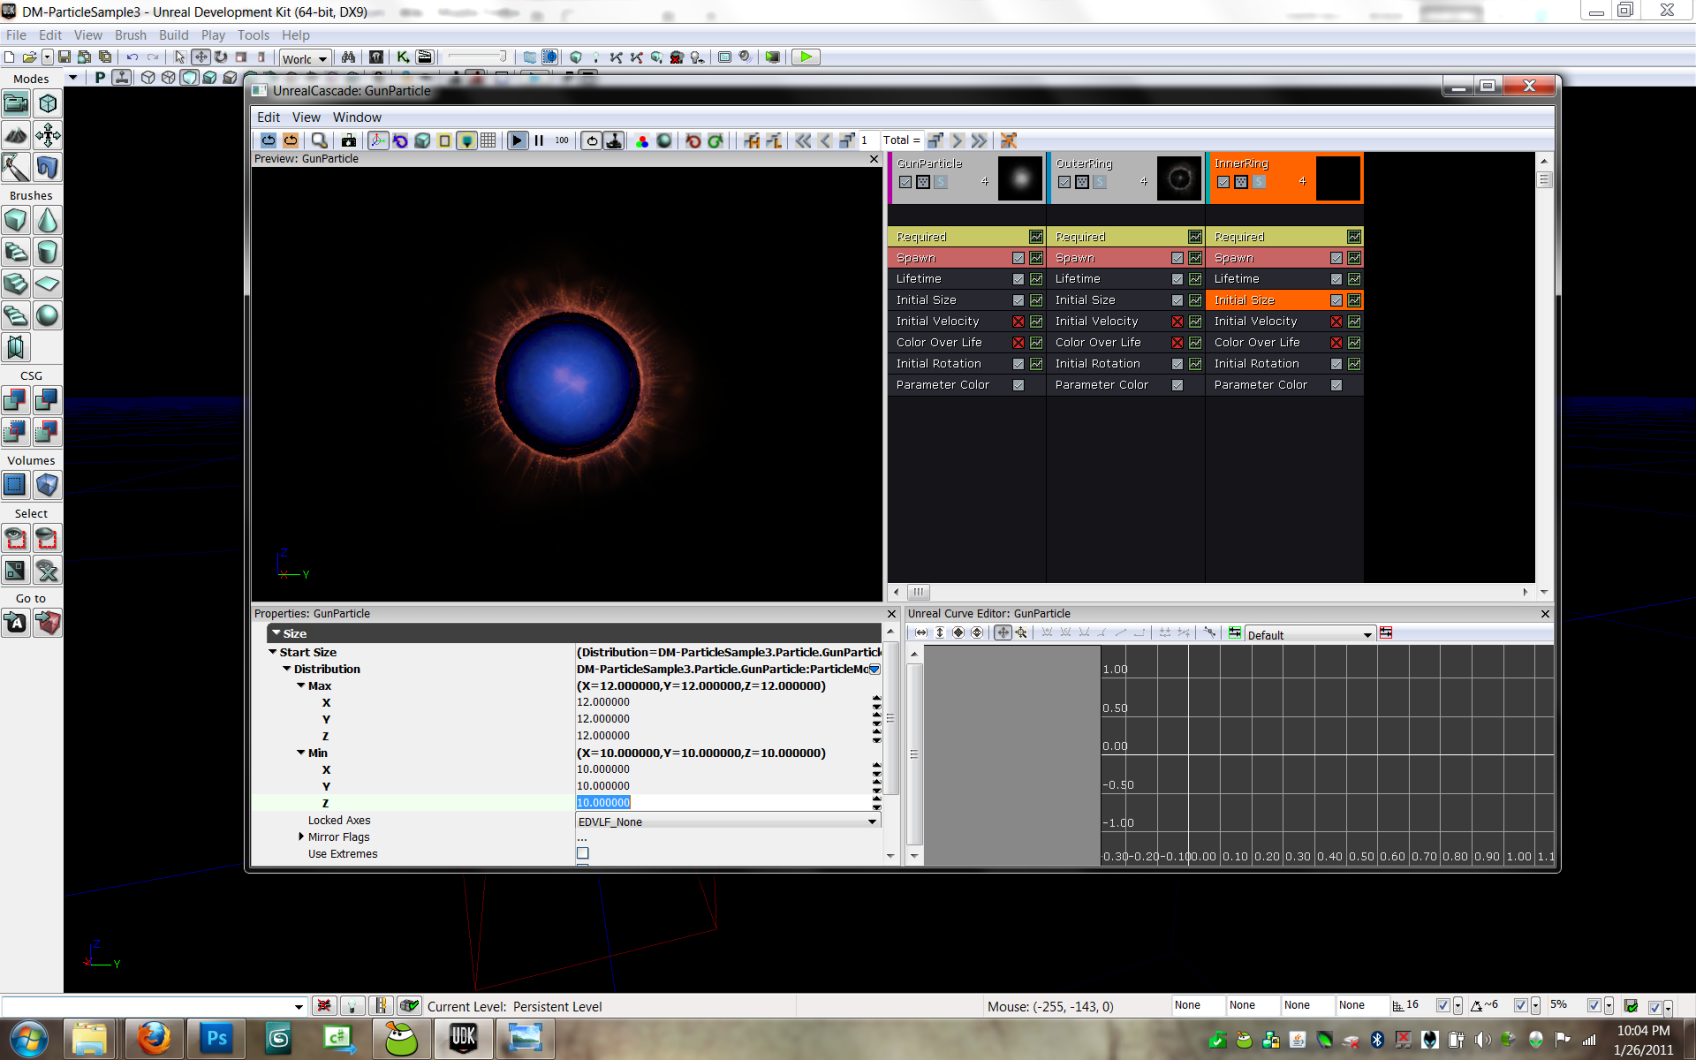
- Click on the Initial Size module and set it to 10-12

- Click on the Lifetime module and change it to 0.6-0.8 seconds
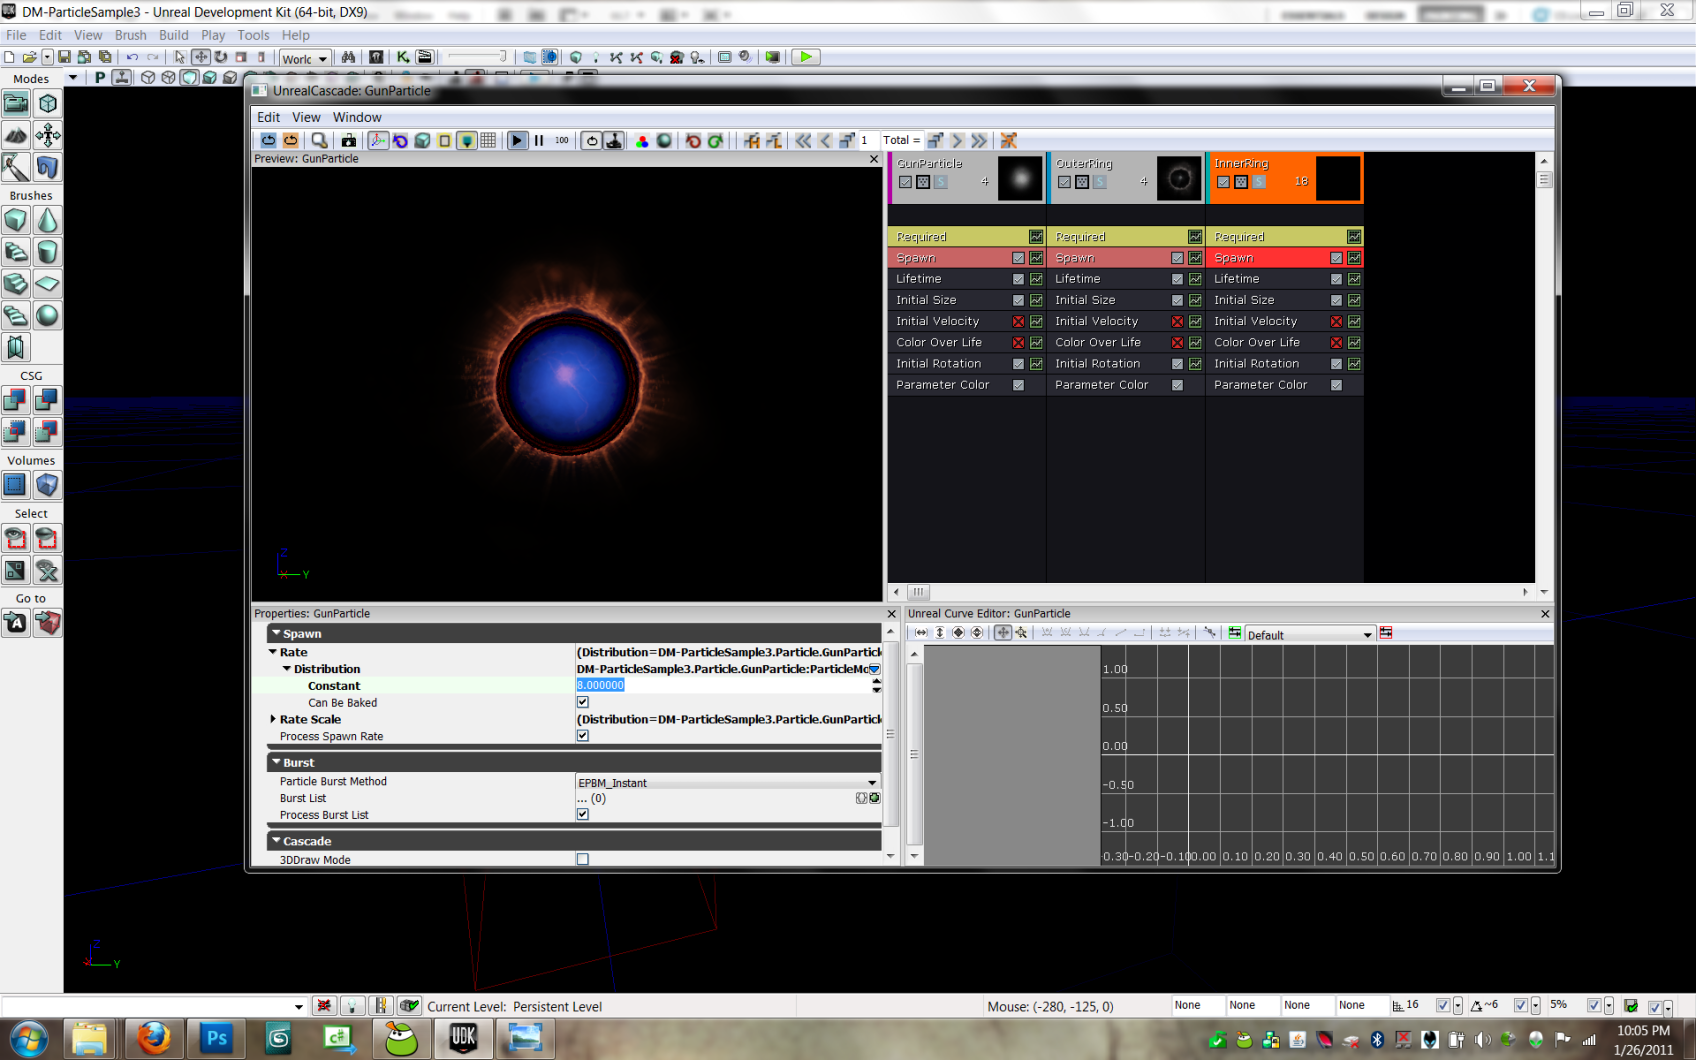
- Click on the Spawn module and change the spawn rate to 8 per second
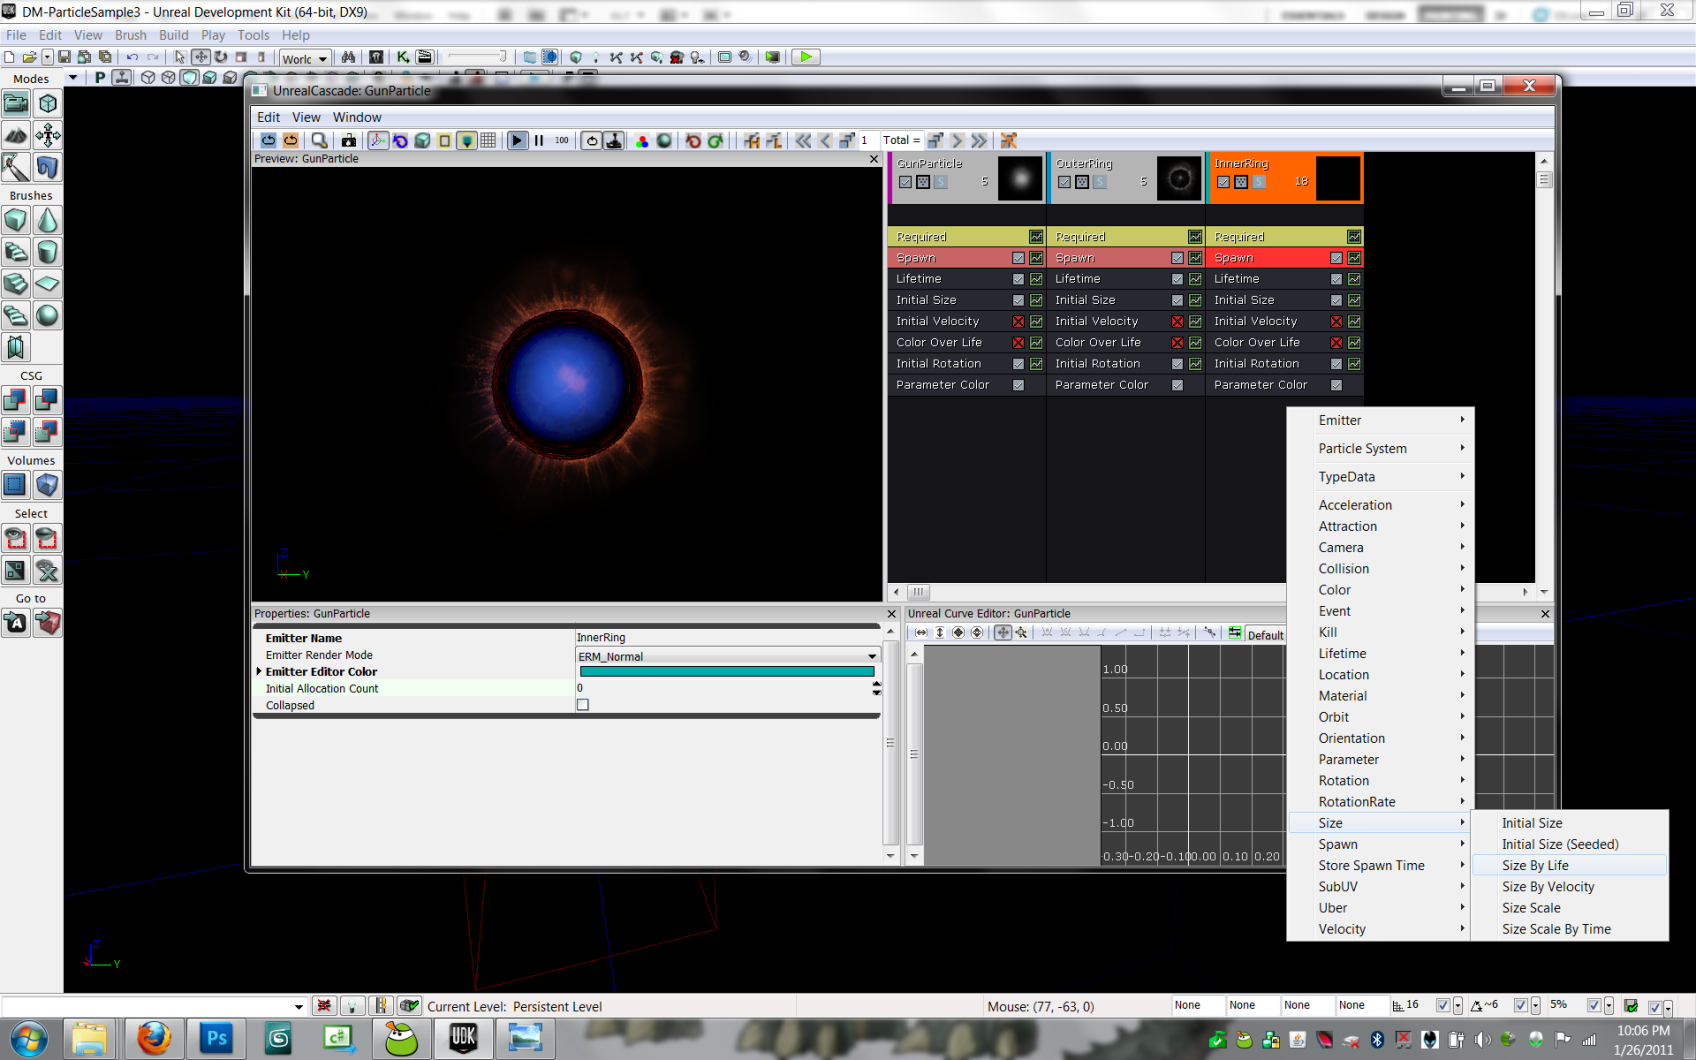
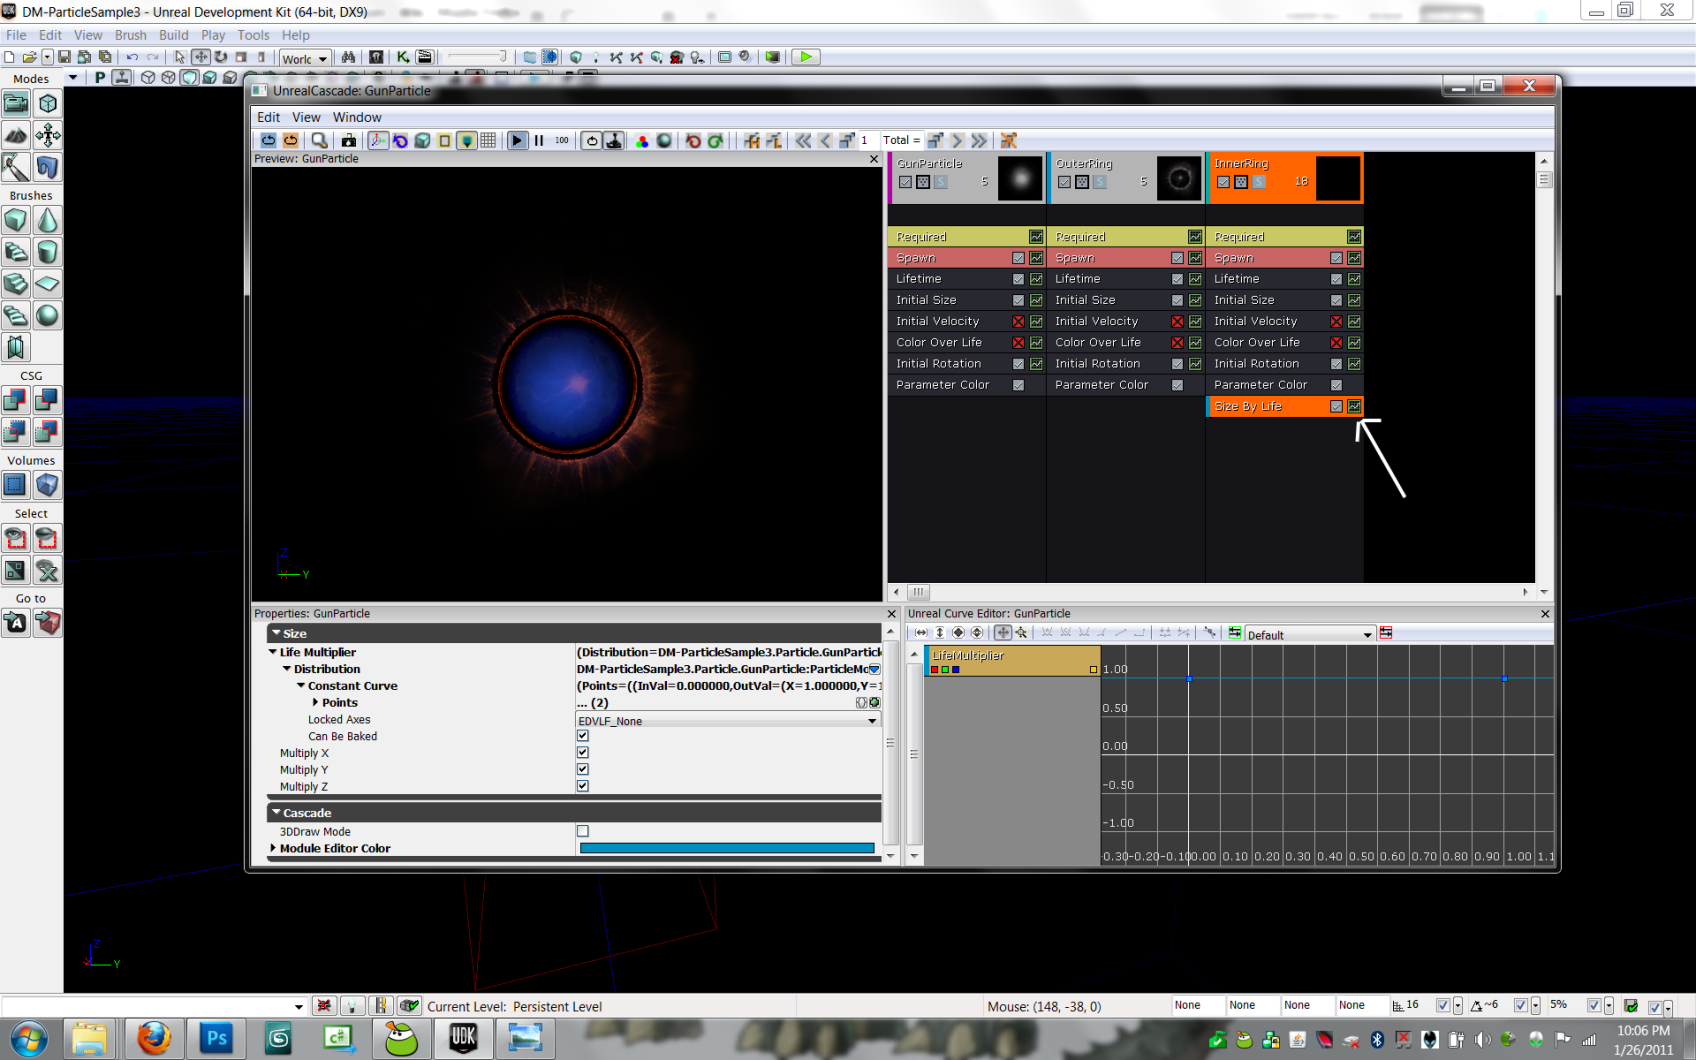
- Add a Size By Life module, and then click on the graph button to bring it to the graph editor
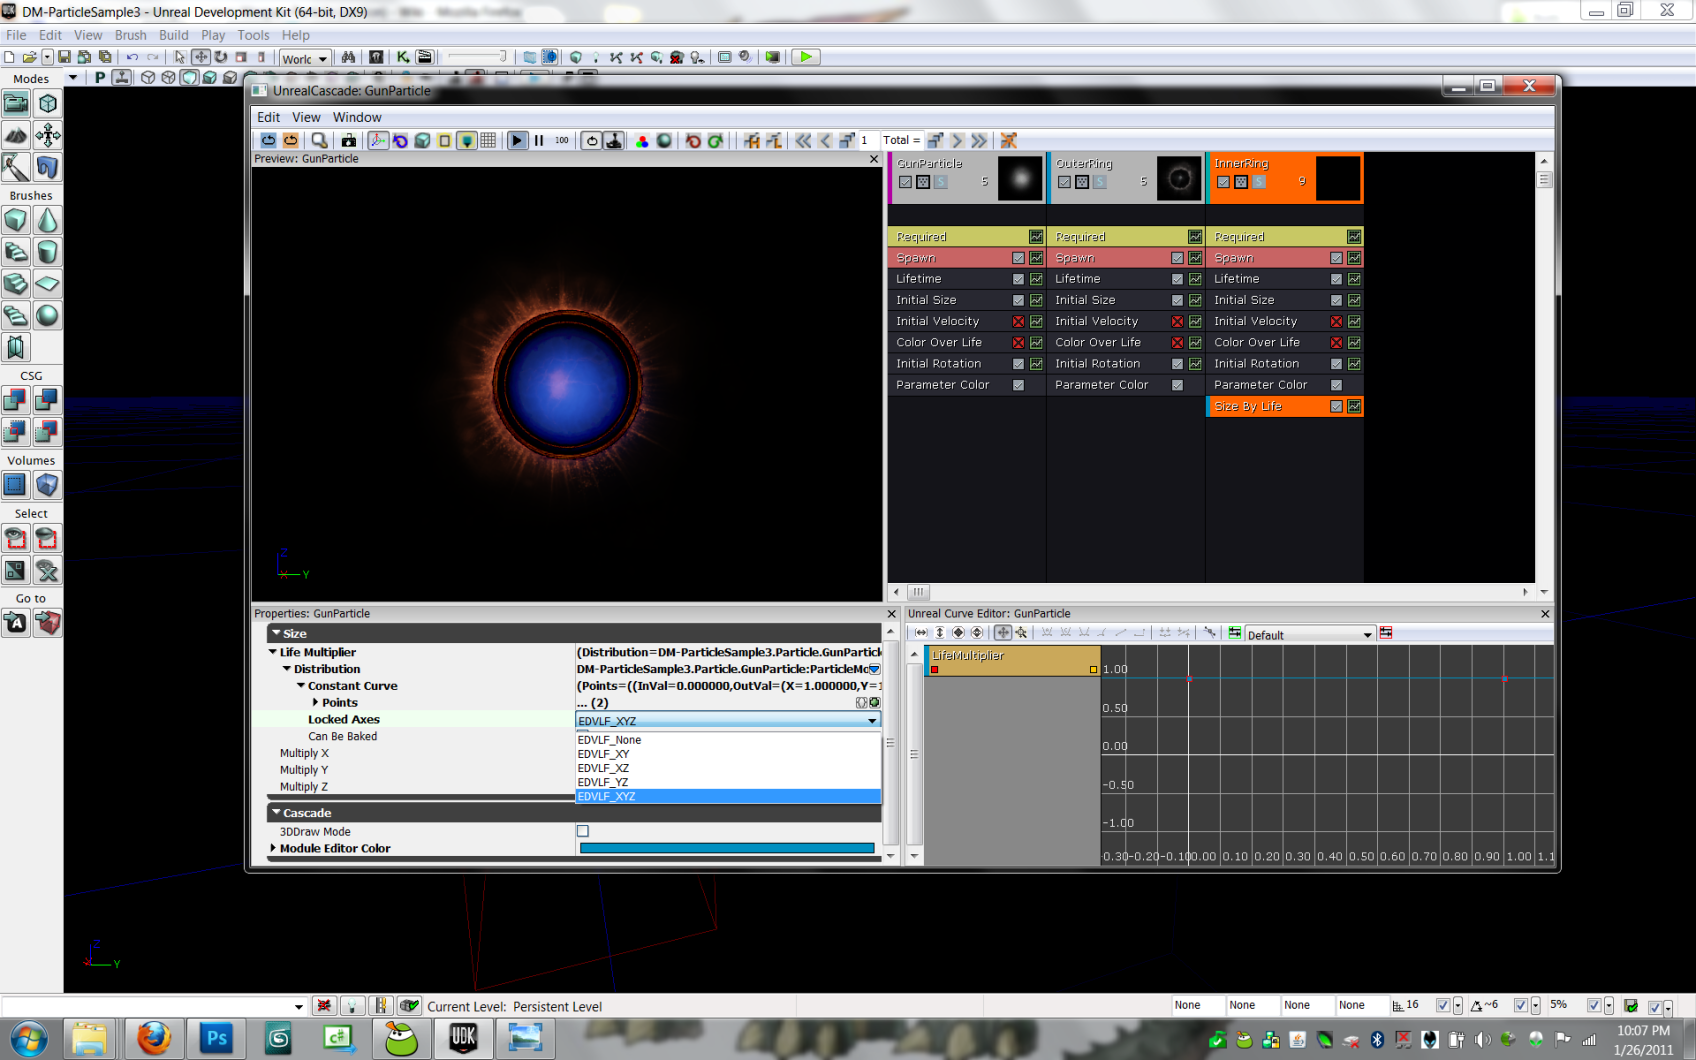
- Lock your X, Y, and Z axis
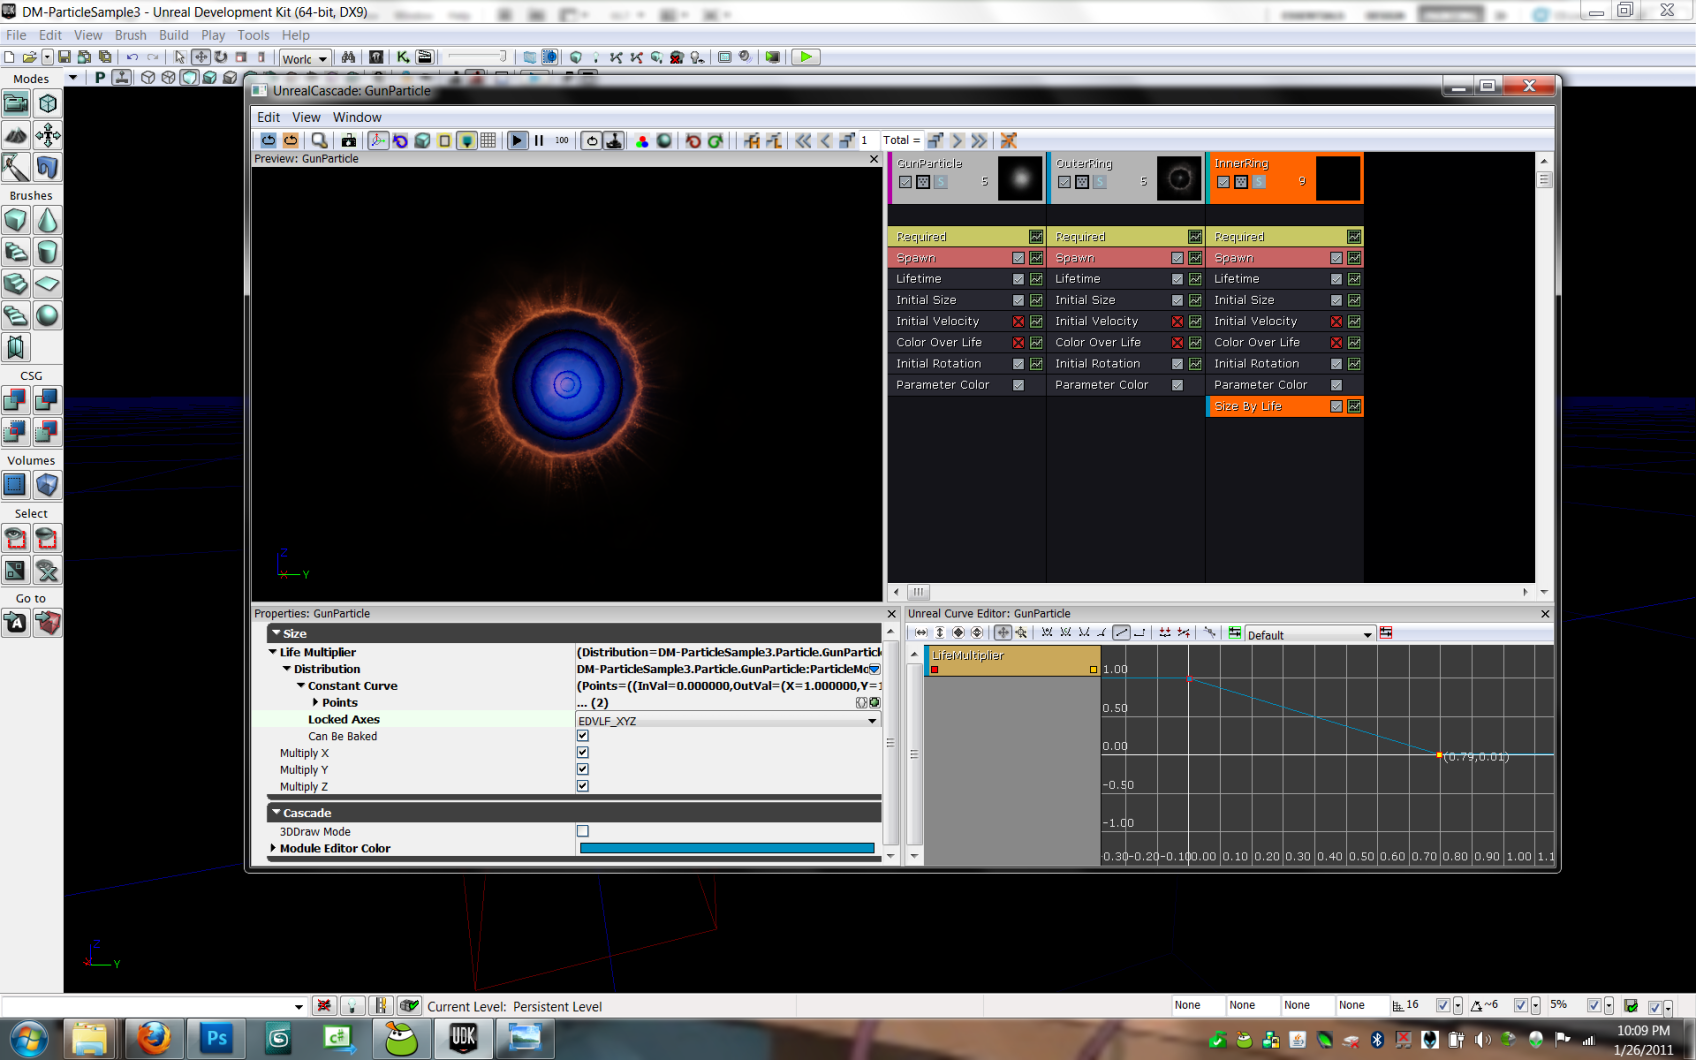
- Use control click to drag the last point in the graph editor to 0.80, 0
Making the Distortion Emitter
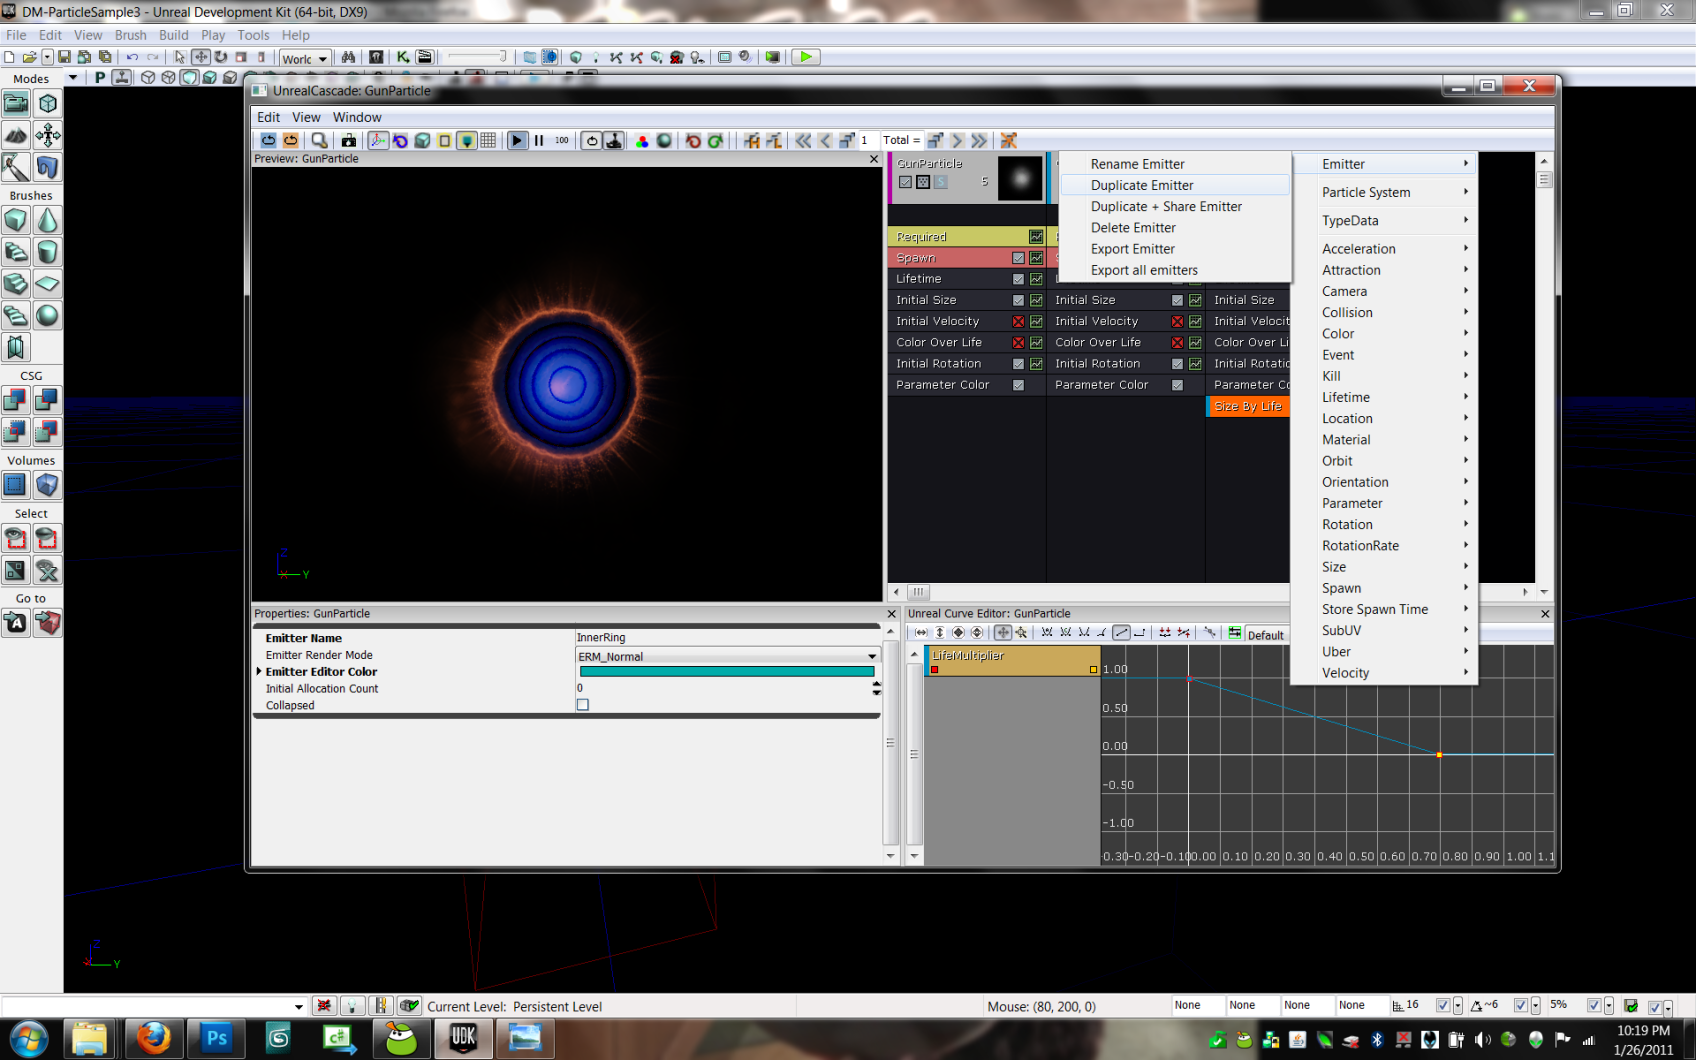
- Right click on the third emitter and duplicate it.
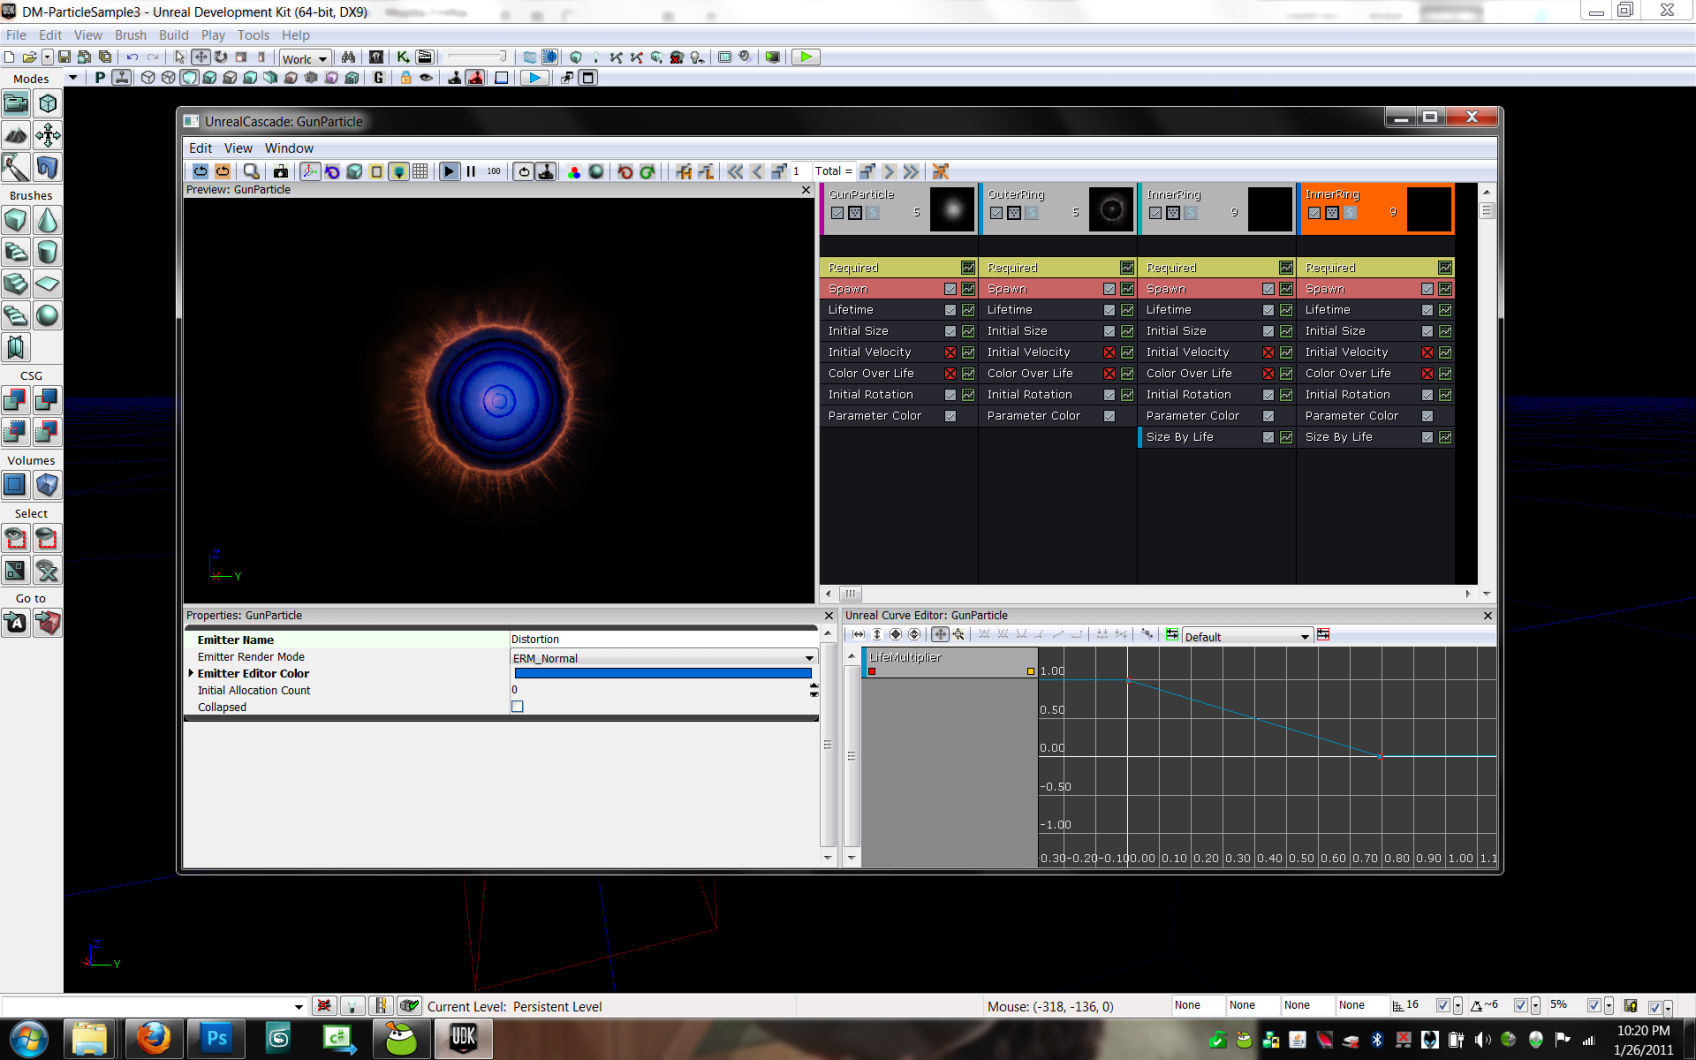
Click on the emitter and rename it.
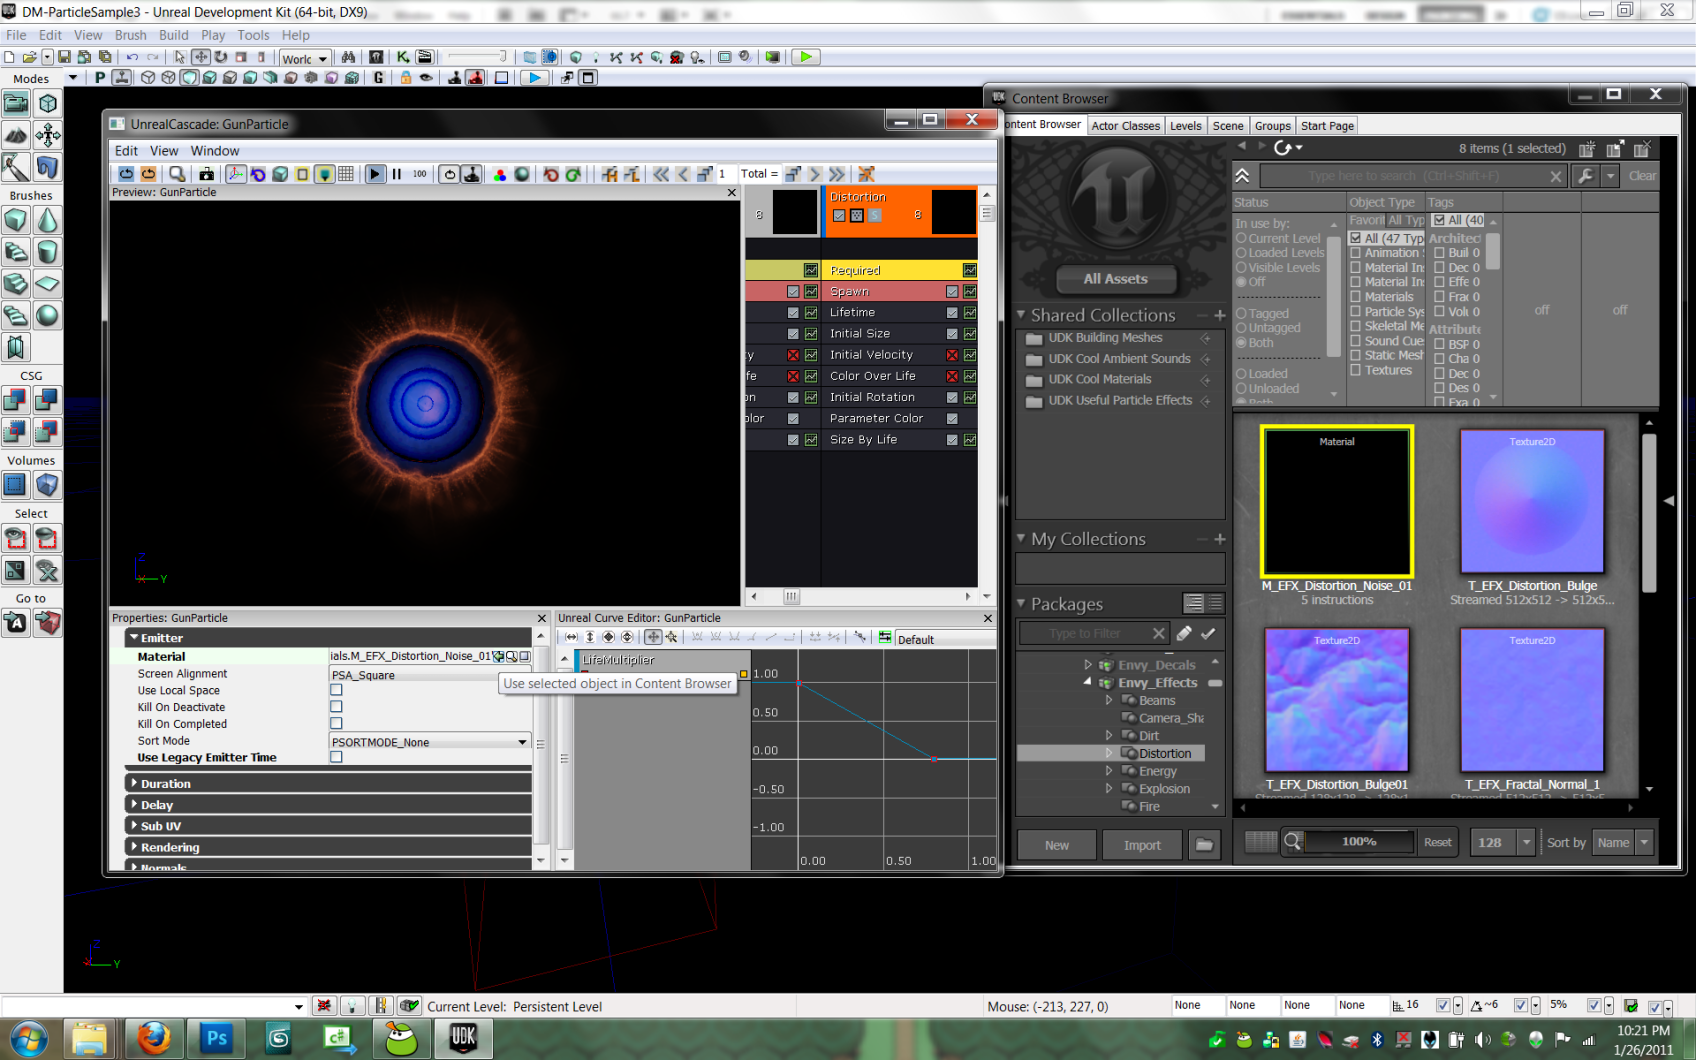
- Find the M_EFX_Distortion_Noise_01 material in the Content Browser and assign it under the Required module. (It is in the Envy_Effects package)
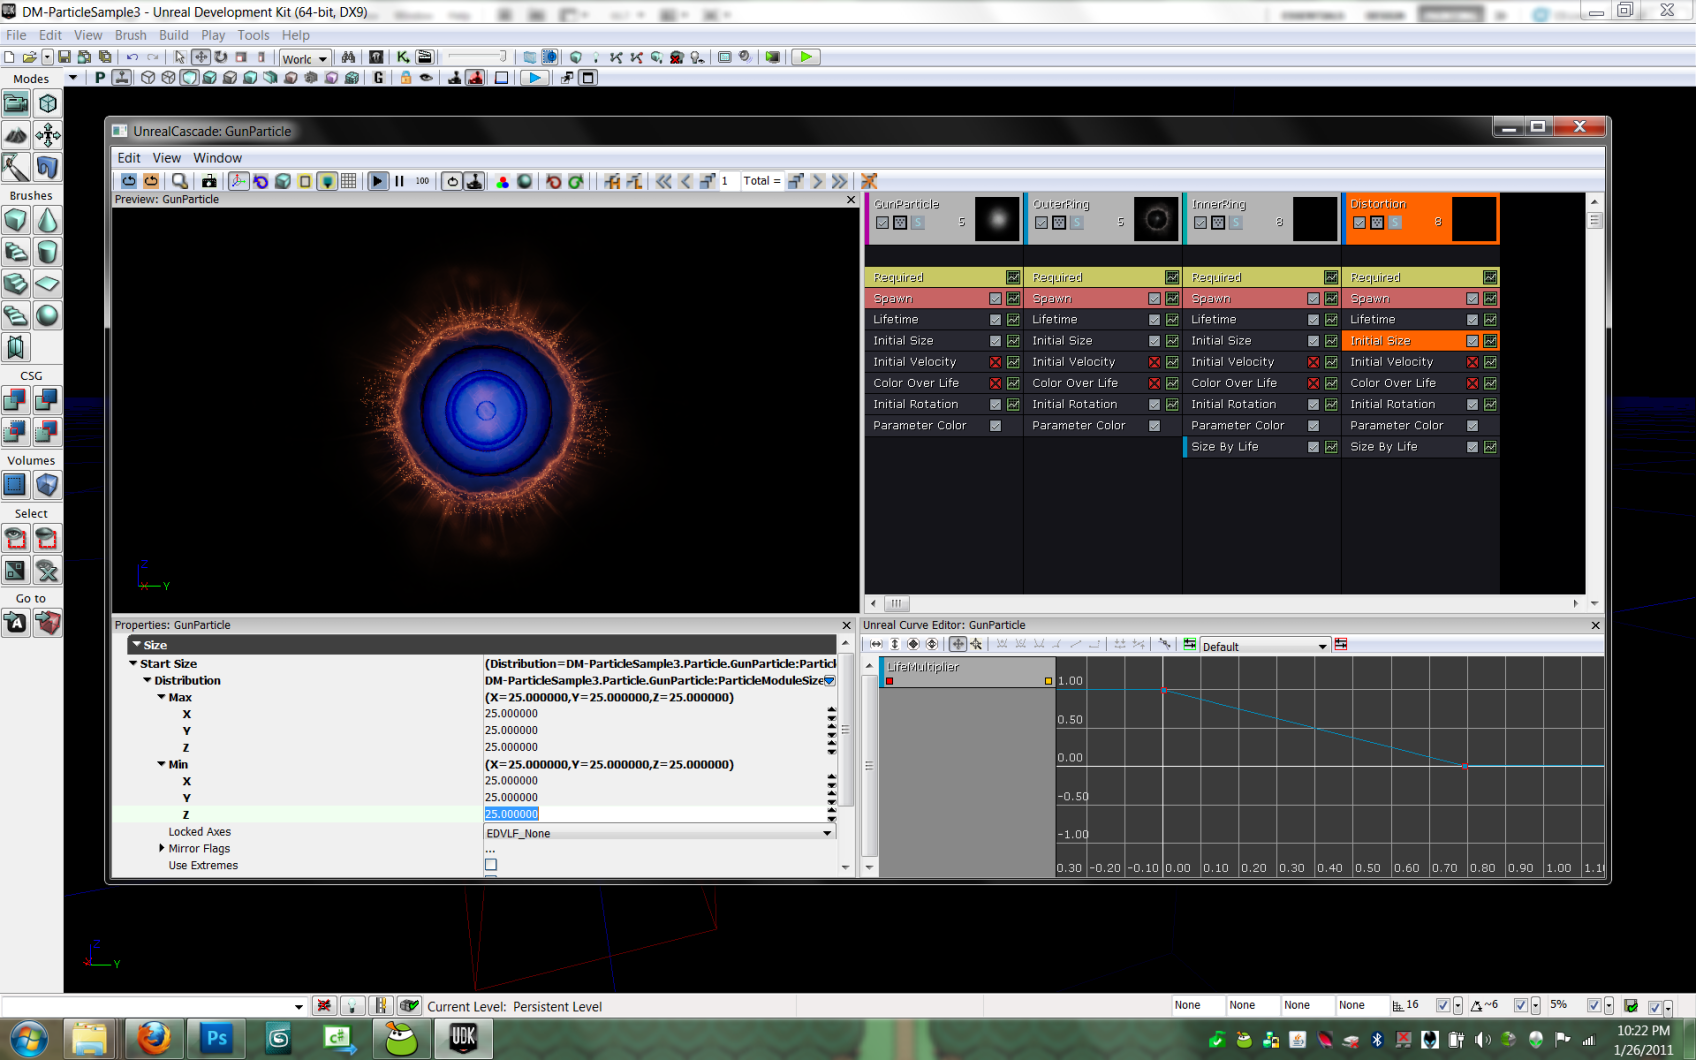
- Click on the Initial Size module and set it to 25
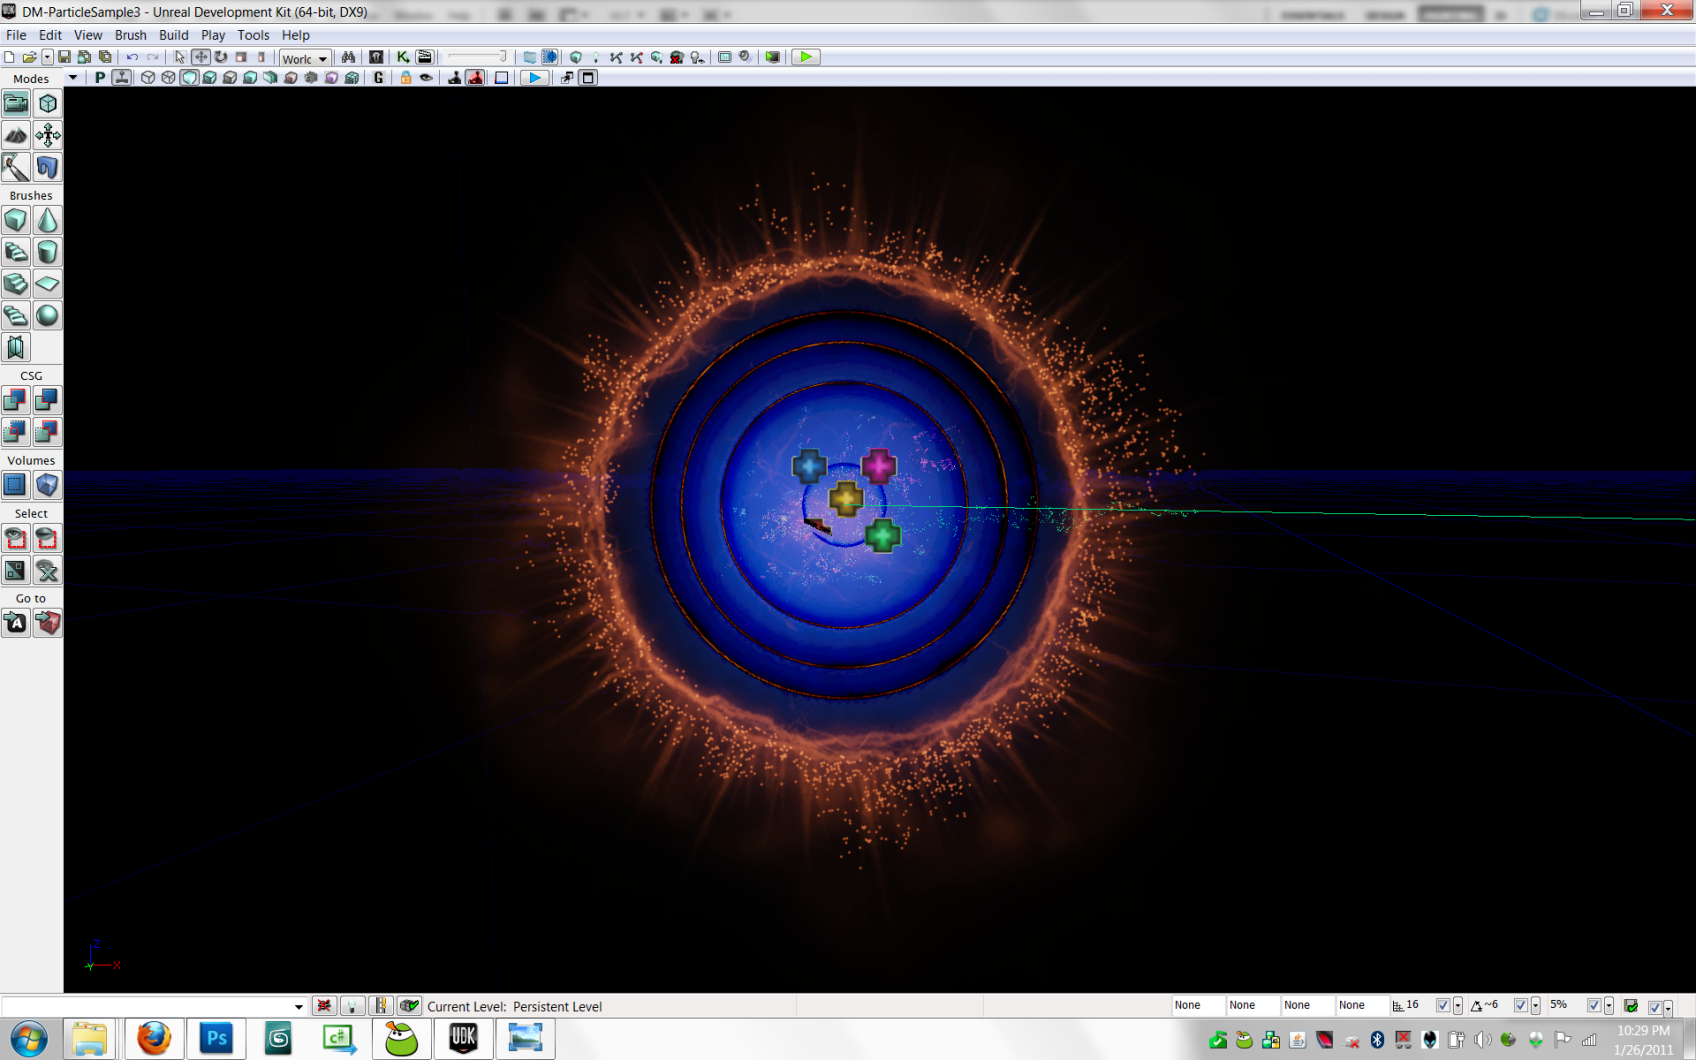
Our particle is done! Close cascade and drag it from the content browser into your level to see it in action.